Best Bench Press Tips and Tricks to Gear up Your Bodybuilding

Get the godly physique with striking biceps, triceps, abs, and shoulders. These Bench Press Tips and Tricks can help you build a body that people envy.

Bodybuilding has always been a craze, and always will be as it seems. Teenage boys and adults are heading towards the gyms to have the perfect abs, shoulders, biceps, and triceps so that they can get an impressive look.

Well, bodybuilding is not men’s genre anymore because it has broken its stereotypical definition, and it is now equally popular among women. Talking about bodybuilding needs an automatic reference to bench press, and that’s because the buildup of upper body depends a lot on bench press.

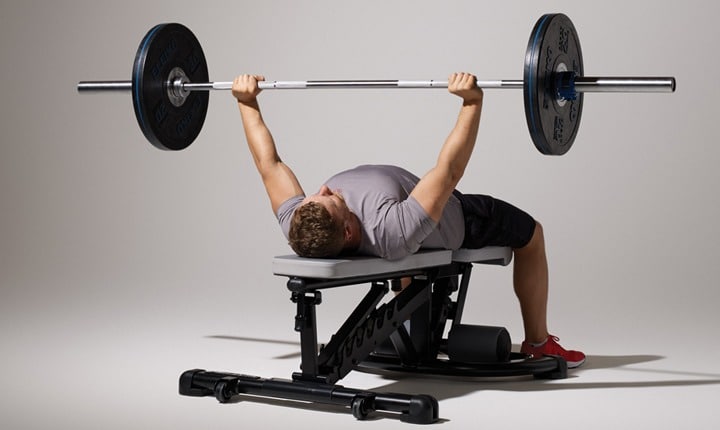
Importance of Bench Press

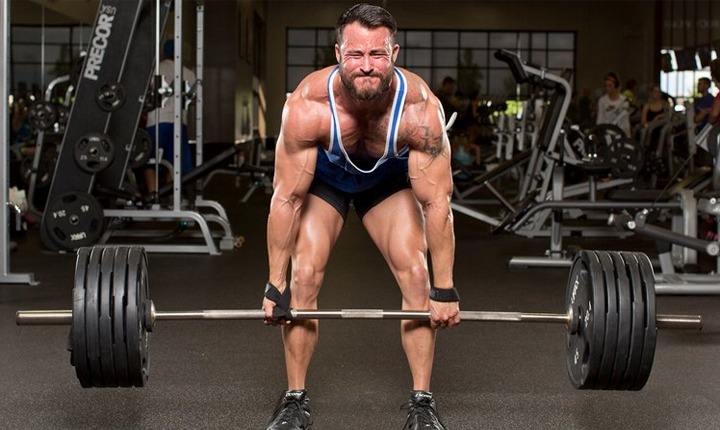
While doing bench press, we all just tend to slide more plates, right? But, we all end up in pain due to the wrong techniques of bench press. Even those who are doing bench press with sufficient weight are not so satisfied with the weight because they want to put more plates. Bench press is sometimes over-prioritized because it is still considered as the base of bodybuilding, and it supplies the strength for the remaining workout.

The Oops Factors of Bench Press

Bodybuilding perhaps has given us a strict deadline, and we need to have that ‘perfect’ build up within that specific day. We just forget to realize that our body has a specific capacity, and we cannot go beyond that. So, if you are trying to get as many plates as possible during the bench press, you are mistaking.

You need to understand that you cannot increase the plates just because you want to get the athlete’s body. You need to understand that the addition of plate in bench press needs proper timing and body flexibility too. If you fail to realize that your net result will be zero. Maybe, a break will become mandatory which means all your previous efforts are just wasted. Sounds not so cool, right?

Now Bench Press Will Be More Effective

For these reasons, proper ways of bench press are very necessary to follow. These following tips will help you to have a perfect understanding of how to master the skills of the bench press.
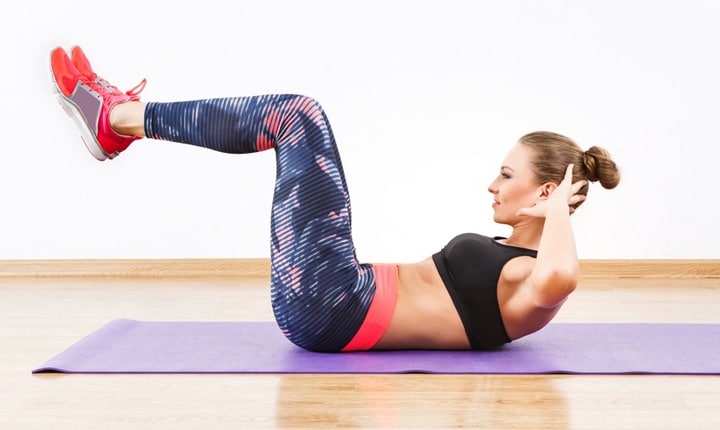
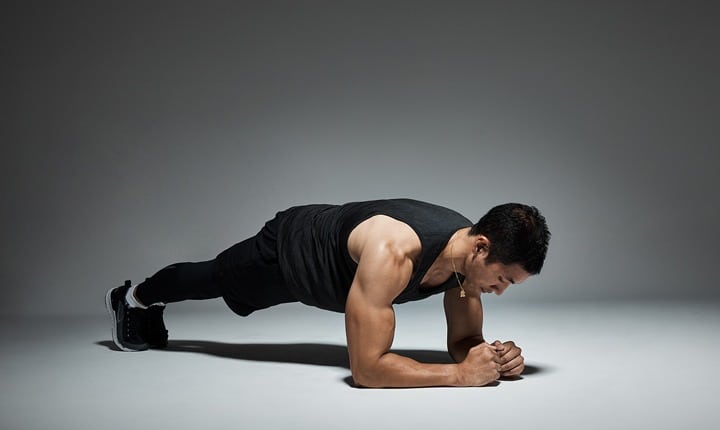
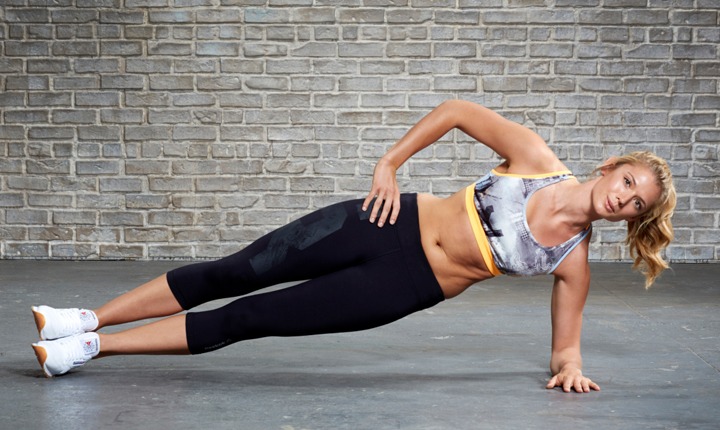
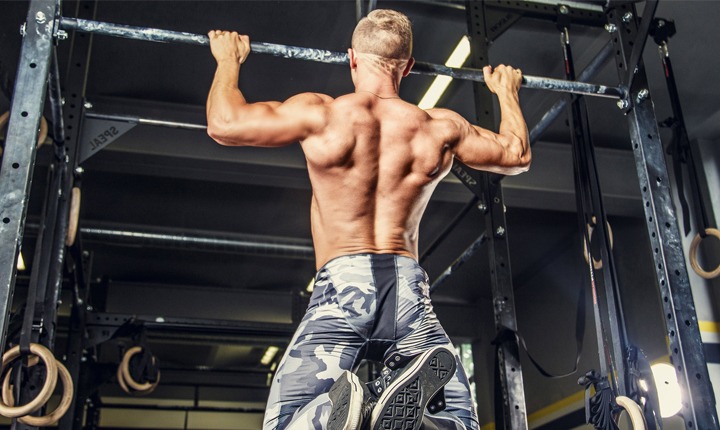
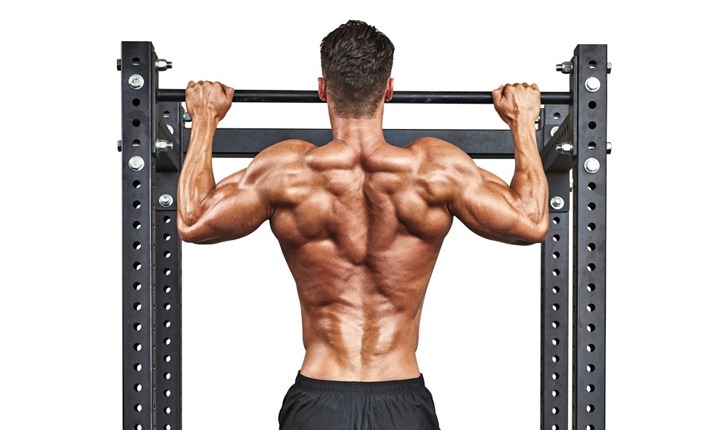
Strengthen the Back

Are you shocked to see ‘back?’ Don’t worry, you are reading about bench press!

We often overlook this during bench press; as a result, things go all wrong. Well, at the time of lowering the weights towards your chest, your back provides the support to your body. So, if you think your chest is strong enough to support you, come out of that misconception. The stronger your back will be, more effective your bench press will be.

Also, your chest will have a better build-up only if your back is strong enough. Along with that, your shoulder blades will get better support. You can do horizontal movements in bench as well as other back exercises to provide adequate strength to your back.
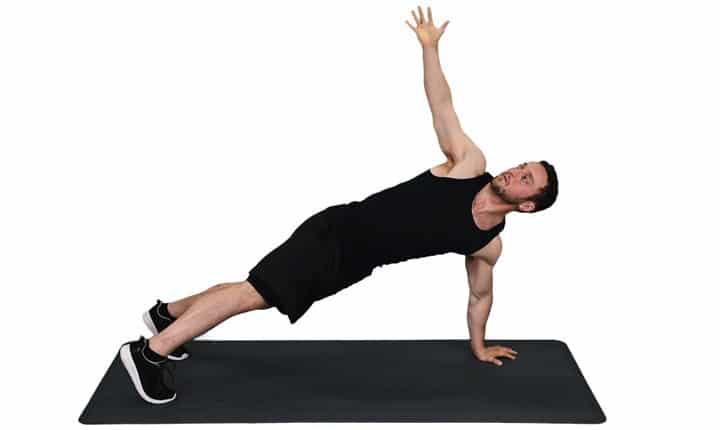
Go For Stretches

Here is the second shock for you, I guess!

Stretches are mandatory for any workout and no exception to this in bodybuilding. Stretch before starting the bench press, to boost up your muscles. Stretches provide the optimal growth to your muscles by making it flexible.

Arm stretches and hamstring stretches are very common, but before getting ready for bench press, you need back, lats, and hip stretch too. If your lats are tight, be sure that these are locked up, and at that moment bench press will be risky.

The stretches will work as the warm-up session for your bench press routine, and it will make you able to take more weights. The following are the most neglected stretches but very necessary for bench press.

  • Stretch your pecs
  • Stretch your lats
  • Stretch the hip flexors

Strengthen your arms with triceps stretch. For those who want an extraordinary buildup of your triceps, just go for JM press with a narrow grip. You may opt for a triceps extension to end the warm-up session.

Improve Your Bench Press Exercise with These Tips

Now just go through the tips to make your bench press even better:

Place Your Feet under Hips

This tip will allow you to add a minimum of 25 pounds in your bench press. Make sure your legs are right under the hips for providing support your upper body. At the time of pushing the weight back, make sure you are pressing your feet towards the ground. You will feel the tension, and it will allow you to get more weight.

Squeeze Your Gluteus

It helps to reinforce the stability at the time of doing the bench press. Due to this, you will get some extra power to lift some more weights as well.

Set the Shoulders in Correct Position

The importance of feeling the tension in the shoulder blades is beyond mention. Therefore, you need to have a proper position of your shoulder blades. The correct position of the shoulder blades during the bench press is at the back pockets because it keeps the shoulder blades downwards and together. It also allows you to slide at least one more plate.
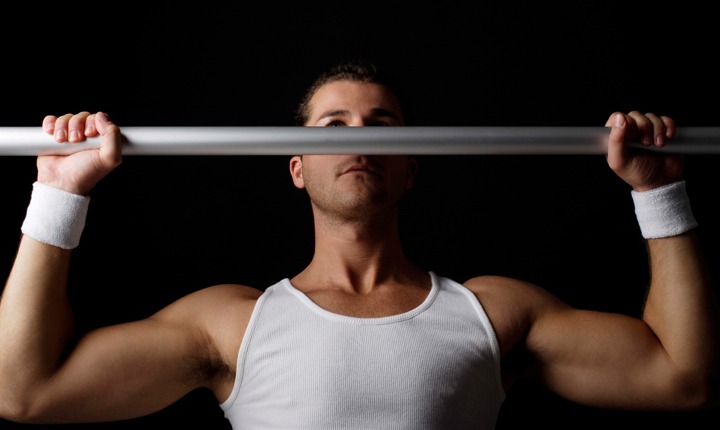
Get the Grips

You need to try different grips and find out the best one that can allow you to have the strongest grip on the barbell. Don’t try the same grips for entire workout session because changing the grips will improve your capacity of lowering the weight.

Settle The Bar

It is very important because until and unless you properly settle the bar, it will not be lowered properly. Make sure you hook off the barbell and give some seconds to it so that it can settle. After it is steady above you can pull it down. Another secret tip is to pull the barbell halfway to your chest at the beginning. After you understand the tension and weight, lower it to the chest.

Try a Thicker Bar

It is a secret trick behind bench press, which will help your bench pressing session easier. A standard Olympic bar will be alright here. It will allow you to have one more weight as well.

Slower the Tempo to Have More Weights

This tip will help you to have stronger and bigger muscles. You must know that you can feel the tension of any exercise twice stronger by doing it at a slow pace. You can gradually feel the force too. Also, you will see that you can do more counts in each set. Performing the bench press twice a week is good. On the first day, try the fast-paced mode, and the second day try the slow-paced mode.

Vision at the Top

Always look at the top because it will give you the strength of a more effective push. Until you push the bar to the top, don’t stop. Keep this fact in mind, and your workout will be even better. You can keep your chest up as well to decrease the distance between chest and barbell.
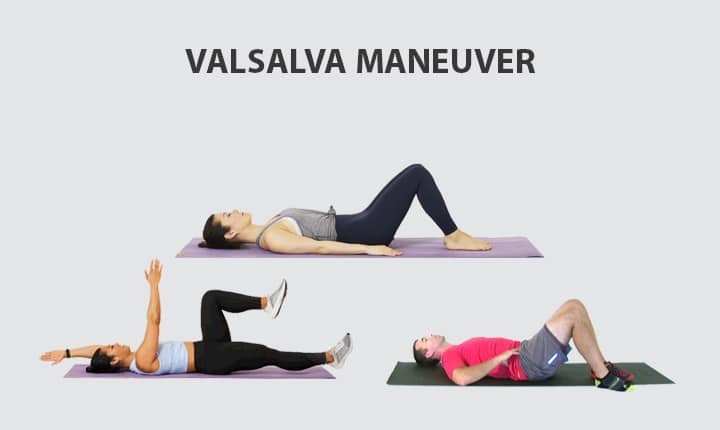
Deep Breathe

It is a mandatory trick for all exercises and for bench press, no exception. At the time of lowering the weight, make sure to take deep breathe. Don’t skip this!

Get Expert’s Help

The bench press can go wrong in case you are doing it without proper guidance, as we have heard after interviewing a number of leading gyms in Kolkata, Mumbai, Hyderabad, and Bangalore to name a few. Therefore, you can search for the best gym in your area and consult the trainer to have an effective session of bench press.

3 Ways How Valsalva Maneuver Helps Reduce Low Back Pain

Thinking of starting Valsalva Maneuver to cure your back pain? Take a look at these must-knows to avoid the mistakes! Train with no fear of injuries.

A common problem among the adults of today is back pain, and mostly the reason for this is sitting and working for long hours in their office. 7 out of 10 office goers have a problem to bend down. Another common problem in these people is seen when they stand after sitting for a long time. Well, that’s a real struggle! Their situations worsen when they try to lift something heavy. Sounds painful? Let’s shed light on the general reasons for back pain.

What Causes Back Pain?

  • Muscle stress
  • Poor posture of sleeping, sitting, driving, working on a computer
  • Accident or injury due to fall
  • Excessive weight lifting exercise or excessive stretch
  • Slip disk
  • Arthritis
  • Lumps
  • Spine cancer

Apart from these, there can be several causes like kidney problems, infections, nerve issues, working in a laptop with bent neck, and so on.

General Tendency During Our Back Pain

As we generally do for other illnesses, neglecting is the first thing we do at the time of back pain.

So relatable, right?

It is the primary reason behind our acute back pain for the long run. We ignore the primary signs of back pain and realize it when it is too late to cure.

Another common tendency is to intake painkillers or pain relief spray/ointment. But, during that, we forgot to realize that these pain killers or pain relievers can give us temporary relief. Because, we are so reluctant to go to a doctor, and we conduct online research to cure back pain. And after trying all these methods, when we realize that our pain is not at all getting reduced, but it is getting more and more unbearable, we consult a doctor.

We start doing exercises as per the guidance of the doctor, and once we start getting better, we stop that. Even, we stop the medicines too.

Valsalva Maneuver In Low Back Pain Recovery

Valsalva maneuver is a tricky technique that can help you to reduce your back pain, and one more thing is –  regular practice of the Valsalva Maneuver can help you to stop your back pain from coming back. Some skills of breathing are all you need to master for this.

Not just that, Valsalva Maneuver has several benefits. Indeed, you can keep your back stronger and improve your overall health. It will help you in digestion as well. But, you need to have enough patience to practise it regularly so that you can have its benefit. We generally want the instant result, but Valsalva Maneuver will not give you that. But once you make Valsalva Maneuver your habit, you will fall in love with this.

When you search for Valsalva Maneuver over the internet, you will get fragmented results. You can consult the best gym in Kolkata to learn this. You can take a look below for the must-knows of the Valsalva Maneuver and do it like a pro!

Remember: A small mistake in the techniques may cause you lethal health issues.

1. Is Your Spine Safe?

Go through a soda test to know the condition of your spine. A can of soda is stronger and take enough weight on it only if the pressure is within it. As soon as you let the pressure come out, the can of soda becomes weak and breakable. This same rule is applicable to the human body.

We generally skip the squats, weight lifting exercises as we have back pain, but, you must now that the exercises are not the reason behind back pain. Incorrect breathing technique during the exercise is the reason.

To keep our spine safe, we must make sure that the stress of the exercises is not on our spine. Proper inhale is mandatory for this purpose because it creates the intra-abdominal pressure, which allows enough force within your oblique, pelvic floors, diaphragm, and rectus abdominus created. It becomes stronger like that filled soda can – firm and strong. Unless you breathe correctly, this force will be missing, and there will be a possibility to hurt your back.

2. Is Your Breathing Technique Correct?

The effectiveness of Valsalva Maneuver depends on the way you breathe. Your diaphragm has an upper cavity and lower cavity. During inhalation, the diaphragm pushes downwards to put more air in the lungs.

Bad posture during breath can prevent this. A good inhale means your belly will move outward. If you use shoulders or neck for breathing, you may get inaccurate results. It’s because you don’t get much oxygen, so, you may need to inhale more. During Valsalva Maneuver, vertical breathing will not create intra-abdominal pressure. It is advised to take help of a mirror at the time of breathing.

3. What Are The Ways Of Breathing Better?

Better breathing indicates breathing while keeping the shoulders down. You can try the following techniques too for this purpose.

Diaphragm Extension – It is a simple technique of breath by lying on your back. It will prevent you from raising your shoulders.  You can put a light object on your belly button to see it going down during exhale and coming up during inhale. Pace will gradually slow down here, and you will feel the calmness. Before sleeping or after a workout, this technique is really good.

90-90 Technique – It will be equally effective for breathing.  90° bend in hips and same angle in knees at the time of breathing is considered as a nice posture for breathing. For this one, you need to lie on the floor and place your heels on the Swiss ball to make a right angle. It will fill your abdomen in all the directions to create proper intra-abdominal pressure.

Dead Bug Style – For this, just lie on your back and keep 90° angle in your hips and knees. Raise your arms towards the ceiling to feel the pressure during breath.  During inhale, pull your knee parallel to the floor making a right angle and during exhale stretch your legs. It will remove the stiffness of your abdominal muscles.

Easy Valsalva

With these techniques, Valsalva is now easier because you will need to fill in your abdomen during each breath. Brace your abs, oblique as strongly as possible during each inhales and release during exhale and repeat the cycle. That’s all.

Rule Your Back Before It Rules You But Know The Risks

Have a control over your long-lasting back pain with Valsalva Maneuver. There is a risk of high BP by doing this. Please consult an expert before doing Valsalva Maneuver. If you have hypertension, know the consequences first. In specific cases, it may result in stroke too, though the chances are rare. So, know whether your body is capable of doing Valsalva Maneuver or not. because there are many alternative ways to reduce back pain too that you can try.

7-Minute Workout – Best Time-Efficient Workouts to Practice

Running busy all day with no time for fitness? Try the healthy and time-saving 7-minute workout session with our easy-breezy guide.

In our fast-paced world, many people refrain from working out due to the painstakingly long duration of fitness regimes. This is especially true for those who hold a 9 to 5 job, wherein they are unable to devote an additional two hours every day for working out. For you busybodies, there is a ray of hope though. With the ultra-modern and innovative 7-minute workout plan, you will get your daily dose of fitness in less than the time you need to eat a burger.

What is a 7-Minute Workout?

The 7-minute workout session consists of 12 high-intensity exercises that are designed specifically to use only body weight as resistance. A great way to improve muscular and cardiovascular strength alongside losing body fat, the 7-minute workout is the latest rage in the world of fitness. To put it simply, they target your core, upper body, and lower body.

How to Do 7-Minute Workout?

There are 72 different types of exercises in this regime that ranges from a push-up to a jumping jack and everything in between, with a ten-second rest period between each type of exercise. 12 of these exercises don’t need anything but a chair and a wall.

The idea is to perform each exercise for a total of 30 seconds, in which you can easily perform up to 15-20 repetitions. Don’t forget to rest for ten seconds in between each exercise. The 12 exercises in this fitness regime are as follows.

1. Jumping Jacks

Jumping Jack

Target Area – Whole Body

A classic fitness exercise, you have to stand up with your legs hip-width apart. Then, you have to jump with your feet open as you lift your arm up to shape your arms like the alphabet ‘X’. As you lower your arms to the sides, you need to jump feet back together.

2. Wall Sit

Wall Sit

Target Area – Lower Body

Position yourself by standing with your back against the wall. Walk away from the wall as you slide down the wall, lowering your body until your ankles, knees, and hips are at a 90° angle.

3. Push-ups

Push-ups

Target Area – Upper Body

Begin with a high plank with your core engaged and with your wrists below the shoulders. Proceed to lower down the chest to the ground, while keeping your back, hips, and legs aligned with one another. In order to lift yourself back up, press into your palms.

4. Abdominal Crunch

Abdominal Crunch

Target Area – Core

Start by lying with your face up on the floor with bent knees and hands extending straight out. After this, press down the ground and engage your core to raise the shoulder blades off the ground a bit forward.

5. Step-up onto Chair

Step-up onto Chair

Target Area – Total Body

While facing the chair, lift your right leg onto the seat. Press into the heel of your right foot to lift up your entire body weight on it while balancing on your right feet. Proceed to put down your back to the floor slowly and steadily. Switch legs and repeat.

6. Squat

Squat

Target Area – Lower Body

Stand up with your legs wider than the width of your hip with your knees above your ankles and your hips stacked over your knees. Hinge at your hip and lower your body down by bending knees. The chest should stay lifted and then lowered to a 90° angle. Rise and repeat. This is probably the most beneficial exercise in this regime.

7. Triceps Dip on Chair

Triceps Dip on Chair

Target Area – Upper Body

Grab a chair, sit on it, and keep your hands on its edge just outside your hips. Walk a couple of steps and slide your butt off the chair while straightening your arms. Follow this up by bending the elbows and lower body until your hands are bent at a 90° angle.  After this, press your chair down in order to return to the position you started from.

8. Plank

Plank

Target Area – Core

Start by placing your arms directly under your shoulders. In order to stabilize your body, squeeze the glutes and engage the core, all while keeping your spine and neck neutral. The back should be aligned with the head.

9. High Knees/ Running in Place

High Knees-Running in Place

Target Area – Total Body

Strand straight up with your legs hip-width apart.  Lift and lower one knee at a time by engaging the core and using your lower abs. It should resemble a scenario of you running in a single spot.  While keeping your thighs parallel to the floor, bring your knees to the same height as your hips and try not to lean back. Alternate between your legs in a pace preferred by you.

10. Lunge

Lunge

Target Area – Lower Body

Stand straight and take a step forward with your right leg. Lower your body until your right thigh is parallel to the floor and your right shin is vertical. Make sure that your knee doesn’t go past the right toe. Press the right heel to resume the starting position. Repeat on both sides and continue alternating between your feet.

11. Push-up and Rotation

Push-up and Rotation

Target Area – Upper Body

Begin in a high plank position and lower your body. Follow this by pressing the back up to perform a push-up. From the high plank position, shift your body weight to the left hand and rotate your body to the left side. Keep the hips high and hold the side plank for one count. Go back to your starting position, do a push-up, and repeat on the right side.

12. Side Plank

Side Plank

Target Area – Core

Keep both of your feet stacked on top of each while lying on one side. Balance your body on your elbow as you lift up the hips. Keep hips and torso aligned with each other by pressing your forearm to the ground.

Is the 7-Minute Workout Safe for Everyone?

You just can’t show up to a gym and expect that you can start doing this fitness regime abruptly. The best gyms in Kolkata will always warn you against it. Proper orientation is a must for this vigorous routine.

Since it is a high-intensity face-paced workout routine, we don’t recommend it for elderly and overweight people. In addition, those who have a history of old injuries, hypertension, and/or heart ailments should stay away from this workout.

Even a beginner whose body is not well-suited for a high-intensity workout should not jump into performing this because it would send a shock to their metabolism and their body wouldn’t know how to adapt to the sudden changes.

The truth of the matter is that the entire duration of this regime is filled with moments of extreme discomfort, which can’t be handled by a newbie. So, don’t overestimate the abilities of your body.

With that being said, for people with experience, this is a wholesome fitness routine that would take care of your entire body and would give them the boost that they need for tackling their tasks in a day.

How to Do Deadlift – An All-Inclusive Deadlift Guide

Deadlift is one of the most intense forms of exercises out there. So, let our deadlift guide come to your aid so that you can master the workout.

Considered to be one of the most wholesome, rewarding, and intense exercises out there, deadlifts are quickly becoming one of the most practiced forms of exercise among gym enthusiasts. Whether it is your gluteal muscle or your hamstring, your quads or your lower back, a deadlift makes sure it’s positive effects are seen all across your body. However, you can subject yourself to serious health hazards if you don’t know how to do a deadlift.

So, to help you out with the same, we have brought forward a deadlift guide that will help ensure you reap the most benefits out of this exercise while following necessary precautions.

How to Do Deadlift – A Detailed Deadlift Guide

How to Do Deadlift

Deadlift essentially refers to the lifting of the dead weight (weight without momentum) from the ground. In this exercise, all repetitions start with dead weight, which is a rarity when it comes to standard weight training exercises. If you are looking for the answer as to how to master deadlifts, you need to adopt the following five-step approach.

Step 1 – Take your starting position, which is keeping your mid-foot below the bar. Please make sure that your shins do not touch them yet. Keep your toes out at a 15° angle. Your heels should be hip-width apart; however, they must be narrower than how they are when you squat.

Step 2 – The second step in our deadlift guide involves you bowing down by bending your feet. Get a good grip on the bar and maintain a distance of shoulder-width in between your two hands. In addition, you have to ensure that your arms are vertical when viewed from the front.

Step 3 – Bend your knees until you are able to touch the bar with your shins in order to drop into your next position. Beware; not to let the bar go away from your mid-foot. In case it moves, you have to resume again with the first step. This would help to avoid injuries.

Step 4 – Raise your chest and straighten your back. In this step, you should also make sure that your mid-foot stays underneath the bar. Place your shins against the bar and your hips where they were.

Step 5 – Now, to the final and most important step – the lift.  Relax, take a long breath, hold it in, and then stand up with the weight. Please ensure that the bar remains in contact with your feet when you pull. Avoid leaning back or shrugging at all cost. Furthermore, lock your knees and hips.

In order to release the weight back, you just have to unlock your knees and hips first. Proceed to lower the bar by pushing your hips backward. Keep your feet straight during this process. Bend your feet further once you realize that the bar is past your knees. You will notice that the bar will land above your mid-foot.

Do not forget to rest for a second in between each rep. Stay in your setup position with your hands placed over the bar. Take a long breath, tighten up, and pull again. Remember, each rep must begin with a dead stop. Never bounce the heavy weight off the ground.

8 Areas to Focus on for Mastering a Deadlift

Body Parts to Focus While Doing Deadlift

In order to fully understand how to master a deadlift, you need to pay attention to these following areas. Of course, everything can be overbearing initially, given the effort this exercise demands from you. But, if you follow our instruction in each of these areas, you will soon adjust well to the mechanisms of this exercise.

If you go and speak to the fitness trainers of some of the best gyms in Kolkata, you will notice that they heavily stress on taking precautionary measures while performing an exercise of this caliber. So, without further delay, please focus on these following key areas.

Hips

The position of your hips for deadlifts will be determined by your body structure. People with long thighs have to position their hips higher than those with short thighs.

The funny thing with hips is that it gets into its position on its own when you correctly align your other body parts. As long as you keep your mid-foot underneath the bar and keep bending your knees until your shins touch the bar while grabbing it, you will see that your hips have been positioned where they are supposed to get positioned. Of course, this has to be accompanied by raising your chest.

Arms

A lesser-known trick with deadlifts is that when you are gripping the bar narrow, at about shoulder-width apart, you will be able to pull more weight. During your setup, your arms must incline from the side.

Do not forget to lock your elbows and straighten your arms before pulling off the weight from the ground, and keep them straight during the entire process until the lockout. The golden rule of deadlifts is to let your back muscles and legs lift the weight rather than your arms since arms are not build to lift such weights.

Feet

When you are setting up the bar, make sure that it is placed over the middle of your foot. This is crucial because your mid-point will act as the balance point. Remember to avoid setting the bar above your toes.

In essence, you will lose your balance if any part of your foot comes up during this whole process. Therefore, you have to always keep your mid-foot, heels, and toes down.

Shoulders

Keep your shoulders in front of the bar while setting up for a deadlift. Avoid keeping your shoulders above the bar since that puts your hips too low. Furthermore, it will also make your shins and knees come too far forward, thereby causing you to hit them on your way up.

In addition, always relax your shoulders. You don’t have to roll them up or shrug them during deadlifts because it may severely affect your shoulder joints. Let your feet do the work of lifting up the weight instead of your shoulders.

Bars

The next lesson in our deadlift guide focuses on the bar.  You need to make sure that the bar leaves the ground exactly from your mid-foot on every rep.

The goal is to follow the shortest distance to reach the lockout, which you can achieve if you move up in a vertical line. So, naturally, you need to avoid horizontal bar movements because they will, without a doubt, lengthen the bar path.

Also, make sure that the floor is even and the bar is still before starting each rep. It is recommended to reset if the bar moves away from your mid-foot while setting up or in between reps.

Stance

Having a proper stance is vital for getting the rewards from this compound exercise. To achieve the perfect stance, you need to set up your heels hip-width apart. This means the wider or narrower your hips are, the wider or narrow your stance will be. The basic idea here is to create a space for your arms in order to stop them from getting blocked by your feet.

Another point you need to keep in mind is to not practice deadlift with a squat stance. A correct stance or posture will also drastically reduce the chances of you getting injured.

Knees

When you are performing a deadlift, you need to push your knees out during the setup in the same direction as your toes. The toes must point out at a 15° angle.

Following this rule will help engage your groin muscles. An underlying aspect that takes place here is that it allows for more of your muscles to work together; which naturally contributes to you being able to lift more weight.

Head

Keep your neck neutral while performing deadlifts.  The goal here is to have a natural inward curve in your cervical spine. You also need to keep your spine neutral so that there is equal pressure on your spinal discs.

Do not look up to the ceiling when you are performing deadlifts since it will squeeze your spinal disc and result in a bad deadlift form.  At the same time, do not look down as well because it will relax your upper-back and make it more likely to round up.

Try to look at a point on the floor that is in front of you since it will create a straight line from your hips to the top of your head. It is often an overlooked aspect of this exercise, which needs to be taken care of.

Summary

Similar to other exercise forms, deadlifts can be as dangerous when performed incorrectly as they are beneficial when they are done with the right procedure. Since it deals with a huge amount of weight, the risks are greater. Thus, you have to be extremely careful when it comes to its technicalities. We hope our guide of how to do deadlifts will position you better in performing this exercise like a pro. With that being said, we highly recommend you get professional help from a gym trainer, especially if you are new to this.

A Detailed Pull-Up Guide – How to do Pull-ups in Proper Methods

A pull-up is only effective when done in proper form and method. Master the art of Pull-Ups in a step-by-step process in our pull-ups guide for beginners.

When it comes to strengthening your upper body, nothing compares to the impact of pull-ups. One of the most popular forms of exercise out there, it is a must for every gym enthusiast. However, despite its massive popularity many people still struggle to figure out how to master pull-ups, which is why we are here to help you get acquainted with this age-old fitness regime that is as effective today as it was years ago.

How to Do Pull-Ups – A Step-by-Step Guide

Almost every best gym in Kolkata heavily recommends including this exercise in your workout regime.  The basics of a pull-up guide can be mastered if you adopt a systematic approach by following the steps mentioned below.

Step 1 – Start with grabbing the bar and making sure that you grip it about a shoulder-width apart. You also need to ensure that you have a full grip over it while having your palms faced down.

Step 2 – Next, you need to raise your legs off the ground by bending your knees. Keeping your arms straight will ease the process.

Step 3 – The third step involves you pulling yourself up by pulling your elbows down to the ground. Elbows must be kept closed here.

Step 4 – The fourth step is the hardest one which basically makes pull-ups so difficult than other forms of exercise. You need to pull yourself all the way up until your chin passes above the bar.

Step 5 – The fifth step in how to do pull-ups is you getting back to your starting position. After pulling yourself above the bar, you need to lower yourself all the way down until both your arms are straight back again.

Listen, it’s totally understandable if you can’t get it right on your first few attempts. In fact, it’s completely natural since lifting up all your body weight is no mean feat.

During your initial days of trying pull-ups, you can do what is known as negatives pull-ups. This means that all you need to do is just get your chin above the bar by, let’s say, standing on a stool or a bench. Feel free to seek assistance from a friend or your gym trainer by asking them to hold your legs during the process.

Okay, now that you have a fair knowledge as to how to do pull-ups, let us point out the key focus areas you need to work upon while performing a pull-up.

Areas to Focus on for Mastering a Pull-Up

While doing pull-ups, you need to focus on the following areas to ensure you get the maximum benefit out of it while avoiding injury at the same time.

Chest

Remember, to always pull yourself up by leading through your chest. An easy way of ensuring this is to touch the bar with your collarbone every time you pull yourself up. The basic idea here is to avoid your shoulders to roll forward.

Lower Back

Your lower back must be kept neutral, meaning; it should neither be over-arched nor flat. Don’t squeeze your spinal discs or hyper-extend your arch. Keeping your ribcage down will help you stay neutral. In addition, your shoulders and knees must create a straight line when aligned.

Elbows

One major mistake people make while performing pull-ups is, when they bend their arms at the bottom when they start the exercise. You always have to ensure that your arms are straight and your elbows are locked when you hang on the bar.

Also, you need to completely lower yourself down after pulling yourself up. Naturally, since the range of motion will be longer here, you will get multi-fold benefits out of it. Don’t forget to keep your elbows close to your torso. To be specific, your elbows should touch your lats or your ribcage should point towards a 45° angle.

Grip

Pull-Ups Guide - Grip

Having a good grip helps make your pull-ups smooth and functional. The main thing you need to focus on here is to ensure that you put your thumbs around the bar. In addition, squeezing the bar tightly would help from you slipping off it.

What essentially works here is that the tighter you squeeze the bar, the more your shoulders and arms get contracted, which essentially means the more strength you gain and the easier the pull-ups become.

Another trick to follow here is to hold the bar high in your hands while closing your fingers. Keeping your palms face up will target your lats and upper backs.

Head

Pull-Ups Guide - Head

Make sure you always look forward while performing this exercise. Contrary to popular belief, do not look up at the bar or the ceiling. Not to mention, tilting your head is also a strict no-no here. Keeping your head in line with the torso is the goal here.

Following this rule will ensure that there’s no squeezing of the spinal discs in your neck. As a result, you can bid farewell to all those horrible post-workout neck pains from doing pull-ups.

Legs

Performing pull-ups with straight legs will keep your lower back neutral. The only aspect that will stop you from following this rule is low hanging power racks, which are predominant in most gyms.

You just can’t keep your feet straight on these low racks because they would inadvertently touch the ground. It is just one of those disadvantages that you have no control over. However, there is a partial solution to this problem. If you straighten your leg down as you pull yourself up, it will keep your lower back neutral. You can bend your legs as you come down.

Bottom

Before you pull yourself up for your first rep, you need to hang with locked elbows and straight arms. Stretch your lat muscles and back as much as you comfortably can. Shrug your shoulder towards the ceiling.

After taking a big breath, you need to pull yourself up by pushing your elbows down. Next, you have to lower yourself until you see your arms are locked again.

Different Variations of Pull-Ups

Diversity in fitness is extremely essential to help get rid of a sense of boredom. Thankfully, we have a bunch of variations in pull-ups which, although are seemingly similar to pull-ups, are significantly different from them in terms of functionality. Take a look at some of them below.

Weighted Pull-ups

As you must have figured out from its name, weighted pull-up exercise means performing pull-ups with extra weight on your body. The objective here is to improve your endurance and strength and increase your overall muscle mass.

To perform this, you have to use a dip belt. It is a type of belt with plates that comes with a chain. You can tie this belt around your waist. The chains will reach the holes of your plates, and it has to be hung between your feet to the belt around your waist.

Chin-ups

Chin-ups are almost as same as pull-ups. The only difference is that in case of chin-ups, you grip the bar with your palms up rather than keeping them faced downwards.  Technically speaking, chin-ups are easier to perform since they make use of your biceps more. They are an absolute favorite of those who prefer having bigger arms.

Lat Pull-downs

In the case of lat pull-down, you need to hold the cable bar just like you hold the bar while performing a pull-up. Make sure that when you sit on the bench, you have your thighs blocked underneath. Follow this by pulling the cable bar towards your upper chest while bending your arms.

Lat pull-downs are easier to perform than pull-ups because you get to put less weight here than what you actually weigh. In contrast, pull-ups force you to lift your entire body weight which can be pretty intimidating for a beginner.

Assisted Pull-up Machine

Assisted pull-up machine is an exercise machine that helps you perform pull-ups.  To set it up, you have to grab the handles just like how you hold the bar during pull-ups. You then have to rest your knees on the designated knee padding.

As the machine lifts up the knee padding, you need to pull yourself up. To be specific, the machine helps you on your way up by making use of counter balance-weight. To get more help in pulling yourself up, you need to set the weight higher up.

Now, although this sounds exciting and easy, avoid it as much as you can since it is not as effective as actual pull-ups. This is because you are resting on a platform when you are using it. As you are not balancing yourself, you are using fewer muscles. Your lower back and abs are basically not getting worked up at all. In addition, you are not stretching yourself.

Summary

Pull-ups are a great source of gaining upper body strength.  This is why it is a mandatory component in almost every kind of workout regime. But if you don’t have proper knowledge of how to do pull-ups, you will end up jeopardizing your health since you will gain no strength, and lose all your energy, all the while making yourself susceptible to injury. Thus, following a systematic, planned, and a safe approach will help you to achieve more and you will end up witnessing positive results in your body.

How to Lose Belly Fat with Healthy and Mouth-Watering Diet?

Tired of maintaining the boring diet for losing your belly fat and still not getting any result? Get tasty diet tips that help in losing belly fat quickly!

Do you think a flat stomach is just to make you look attractive and smart? Not at all friends! A toned tummy and slimmer waist can also save you from chronic diseases like cardiac disease, cholesterol, fatty liver, etc. People are jumbled up with two questions – how fat gets stored in our body and how to lose belly fat.

Now, the first answer is simple because today, you will find people gaining fat in their waist and stomach portion because they sit and work for a long time in office, eat fast foods as snacks and skip workouts because of the busy schedule. This makes the bottom part of the body heavy, and gradually your waist and tummy start gaining cellulite.

This is the common issue in this generation that you try to solve by hitting hard in the gyms near you or skipping meals, but the result is zero.

Ask why! Doing exercises and eating less meal will really not solve your problem, you need to choose an appropriate diet and exercises to cut the entire fat from your belly. A zero figure can only be made when you are following a zero-belly diet and appropriate physical activities done in the nearby multi gyms.

Smart Diet Tips to Lose Belly Fat from Dawn to Dusk

Going to the luxurious multi gym near you and shedding sweat regularly will never work if you come home with a bag of caramelized chocolates and potato chips. Hunger craving is natural after practicing lots of exercises and jogging at every early morning. But satiate your appetite with healthy and interesting foods.

It is not necessary that you have to cut protein, carbs and fat from your diet; you just need to balance all the nutrients with your body. You will find the second answer if you brush up your eyes on some ideas. Let’s have a look at how to lose belly fat and burn calories with a smart diet plan suggested by the nutritionist of the best multi gym in Kolkata, Starmark Fitness Studio:

1. Start Your Early Morning Breakfast with Fiber-Loaded Oatmeal

Health experts say, have your breakfast like a king and dinner like a beggar. So, fill your stomach with healthy food after you get up in the fresh morning. Stop eating bread with butter and burger in your breakfast which will increase your fat and cholesterol level.

Try oatmeal breakfast because it has low calorie, high fiber, and protein which helps your digestion properly, and once you start digesting, your fat belly will naturally get toned. Moreover, it will boost up your body with energetic vibes, and it will also keep your fit and active throughout the day.

Interesting Way to Make Oat Recipe for Breakfast:

  • You can add milk, dry fruits, honey, and fresh fruits to make the oatmeal interesting and tasty.
  • You can delight your hunger by cooking the oats with olive oil, almonds, and fresh vegetables with pink salt if you like salty breakfast.

2. Satiate your Mid-Morning Food Craving with Some Fresh Fruits, Natural Smoothies or Juices

No, having fruits do not mean that you will eat too sweet fruits like Sapodilla and Litchi which can increase your weight, as suggested by the expert nutritionists of best gyms in Kolkata and other cities. Try to consume fruits that have vitamin, minerals, and anti-oxidants like red berries, apples, peach, avocado, and plums. Also, choose some citrus fruits like grapefruit, orange, cucumber, and black grapes.

A bowl of fruit salad, fresh smoothies and juice will help you cut fat from your midsection part, cut the cellulite and flush out the toxins from your body. Moreover, this type of mid-morning snacks will help you satiate your hunger and thirst at a time. Anti-oxidants help in controlling cholesterol, heart disease, thyroid, and many other chronic health issues.

Fascinating Way to Eat Fruits:

  • Add the aforesaid seasonal fruits in a grinder and blend it. Put the smoothie in a glass and add a pinch of black salt for taste. Add red cherries or green raisins as the topping. You can also carry this smoothie to your office in a thermal bottle.
  • Cut all the fruits in cuboid shape and keep them in a bowl. Now add some pink salt or black salt and toss them with a large spoon. You can eat this at your weekend in the mid-morning or pack that to your office or college. It is one of the best snacks that will cut your belly fat and satisfy your hunger.
  • You can also make a simple juice of all the fruits, strain them and drink them whenever you want without adding salt or honey.

3. Power Up your Lunch with Sprout Bread, Green Vegetables and Eggs

You will get a different type of bread in the market like white bread, whole-grain bread, and sprout bread. Never buy a white bread which has no nutritious value, instead, choose brown bread or sprout bread for your lunch and dinner.

The people who are keen to know, how to lose belly fat with a good diet, experts of your nearby gym will always suggest you choose sprout bread because it has high fiber and medium carbohydrate.

Fiber helps in good digestion and flushing out the cellulite, and carbohydrate helps in balancing your weight. So, include brown bread in your diet, and you can add boiled or tossed green vegetables like cabbage, lettuce, spinach, tomato, beans, carrots, and garlic.

Adding garlic in your diet can help you losing your tummy fat and including these vegetables in your lunch can provide you nutritious value, carbohydrate, vitamin and protein which will help you with good immunity and strength after doing lots of physical activities or daily works.

Also, add an egg or boiled chicken in your lunch because both have protein and good fats. These fats will help to cut your belly fat and to bring glow in your skin. You can easily carry the above-mentioned things in your lunch box if you are going to office or college.

Nutritious Ways to Make a Delicious Lunch with Bread and Veggies:

  • Cut a slice of bread in a cone shape and add slight peanut butter. Now cut some onion, cucumber and lettuce leaves to stuff them between the cones of the bread. Sprinkle some pink or black salt and pepper in it. Now your green sandwich is ready to eat.
  • Take a slice of bread, make an egg poach or an omelet with pink salt and black pepper, and place it on the bread and give some grated mayonnaise which is optional. You can add onion rings, fresh ice lettuce, and cucumber and place another bread on the top. You can keep the bread like that or you can also grill it.
  • Boiled egg, scrambled egg or a plate of vegetable and chicken salad are also great ways to have a superb lunch.

4. Satisfy Your Evening Hunger with Dry Fruits and Sprouts

After having a light lunch, it’s obvious that you will be hungry after 5 pm. So, what to eat at that time which will help you lose belly fat? Nothing much, just carry sprouts salad made of sprouted chickpea, sprouted and bean seeds with you in office or eat the salad when you are at the home. This is the healthiest snacks that will help you manage your weight.

Pulses are always good for cutting belly fat, so why don’t you try these snacks instead of chips, burger, pizzas, and noodles? You can also carry dry fruits like raisins, almond, apricot, green pistachio and peanuts which have the best nutritious value and dry fruits also help in killing bad cellulite in your body.

You can also have a cup of green tea/coffee or black tea/coffee with the sprout salad at evening.

Interesting Way to Make Evening Snacks:

  • Take a bowl and add sprouted chickpeas, green peas and sprouted bean seeds. Sprinkle a pinch of black salt and add mint leaves on it. You can season it with lemon juice to add taste in your evening delight.
  • Take a handful of dry fruits like almond, raisins, date palm, dried berries, pistachios, peanuts, and corns if you are feeling hungry in the evening but eat in a limit. Too much consumption of dry fruits is not good for your appetite.

5. Light Up your Dinner with Boiled Chicken Strew, Vegetable Soup or Grilled Fish

Fitness coaches and nutritionists always suggest having light food at dinner because when we go to bed our body is in rest and we don’t do any activity at that time. So, it is necessary to consume light but nutritious foods at night.

Don’t fill up your stomach by eating more and more at night because that can directly affect your belly. Make a chicken or vegetable soup, chicken or vegetable salad, egg mixed vegetable salad, grilled chicken or fish.

Chicken and fish have the high protein and omega fatty acid which help in cutting the fat of your body, bringing a glow to your skin and saving you from stroke and major heart attack.

Eating plenty of vegetable help in flushing down the fat from your entire body and storing your immune power.

Delicious Ways to Make Dinner:

  • Cut cucumber, fresh lettuce, tomato, onion, cabbage, carrots, celery leaves, spinach, and mint leaves and season the veg mixture with olive oil, black pepper, oregano, and pink salt. A nutritious bowl of salad is ready to eat.
  • Take a pan, stir fry some vegetables like cabbage, garlic, onion, carrot, tomato, broccoli, capsicum, and mushroom. You can boil it before frying it in olive oil. Season it with pink or black salt, black pepper, and lemon juice. Now add vegetable stock and boil the vegetables for 15 minutes. Your soup is ready to serve your appetite. You can add boil chicken or egg white to the soup.
  • Boil fish pellets or breast pieces of chicken and grill it at microwave by brushing olive oil and sprinkling black salt. You can garnish it with onion and cucumber rings.

Bonus Tips to Lose Belly Fat

Along with the diet plan, there are some specific bonus tips made by health experts of the best multi gyms in Kolkata and other places. These tips will help you to reach your fitness target soon.

  • Brush teeth after every meal because as per nutritionist brushing your health several times can help in losing fat.
  • Stop overeating if you are hungry, instead have a glass of Luke warm water to fill your appetite.
  • Add acidic food to your diet like lemon with warm water in the early morning and grapefruit juice at mid-morning.
  • Do not skip meals because that is the main reason for increasing weight.
  • Practice minimum 20 minutes workout, and 10 minutes walking or jogging to cut your belly fat fast.
  • Don’t forget doing stretching and warm-up exercises in any gym near you before intense workouts because warm-up prepares your body to run a long race of fitness.
  • Go for a walk in the early morning because Vitamin D (sunlight) and fresh air help you get faster results.
  • Avoid eating sweet products, fast foods and junk foods which are the source of calorie.
  • Drink water after half an hour of every meal to get the food digested in your intestine.
  • Wake early and sleep early which will help in balancing your body structure and lifestyle both.
  • Stop sugar preservative and cane foods which have high fatty acid.
  • Avoid oily and cheesy foods which are the major sources of fat in your belly.
  • Don’t sit constantly for a long time, take a break or walk because sitting can also be the reason for belly fat.
  • Try to take plenty of sleep because insomniac people have a high tendency to gain weight.
  • Never eat after dinner because that will increase cellulite in your body. You can drink a glass of milk without sugar if needed.
  • Drinking the mixture of coriander and mint leaf juice in an empty stomach can help you in cutting your belly fat.

Hope your query, how to lose belly fat with a good diet will be solved after reading this article. Just hit your early morning gym at every morning, practice long walks and eat nutritious food to get a toned tummy and attractive body.