Resistance Training Guide – 5 Parameters to Remember

Resistance training can help you to be healthy. Know how to do resistance training in our guide. Learn 5 tricks for more effective resistance training.

Have you tried running on a watery surface? It’s tougher to run on it compared to the dry surface, thereby causing you to run slower and forcing you to put more effort to run faster, owing to the reason that the water resists more than the land. But why are we referring to this when our article is about the resistance training where we should talk about the muscles and exercises? Well, that’s because we want to explain how resistance works! In this example, when we put more effort, our muscles work harder than usual, ending up being stronger than it would have by running on a dry surface.

Did you get it? In simpler words, resistance workout or training is a form of training where some kind of force is working against you or resisting each of your movements to make you use more muscle power. And that is the reason why the world is always praising resistance training.

When the term, ‘Resistance Training’ pops out, almost everyone thinks about weight lifting but there are a number of other kinds of activities that can fall under the resistance training category including running with parachutes, dragging sleds, and bodyweight exercises.

So, in this resistance training guide, you will learn all the basics of resistance training and workouts. If you want to more, you need to consult a fitness expert. Starmark has always been there for providing you with the right information regarding different workouts and training.

What is Resistance Training Workout?

As mentioned earlier, resistance training is basically the exercises which make our muscles work against an external force (i.e. resistance), resulting in increased and improved strength, hypertrophy, endurance, and power. Everything that causes muscles to contract like exercise tubing, bricks, dumbbells, water bottles, your own body weight, and many others can be used during the resistance training. However, along with the resistance training, it is recommended to get maintenance programs in order to enjoy long term health benefits.

What are Some Resistance Training Workouts?

Well, there are many ways you can make your muscles strong. Whether home or gym, you can practice the following types of resistance training. Take a look:

  • Weight Machines: Equipment with an adjustable seat and handles, which are attached to hydraulics or weights.
  • Free Weight: Old school strength training with barbells or dumbbells.
  • Resistance Bands: Portable in nature, these are rubber bands of giant size, used in many workouts for constant resistance throughout a movement.
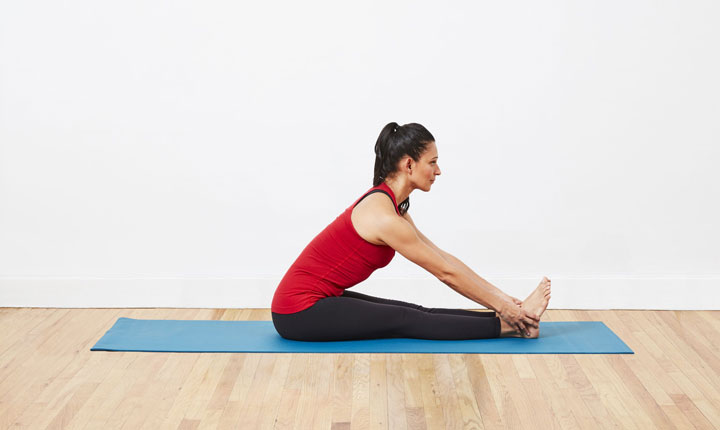
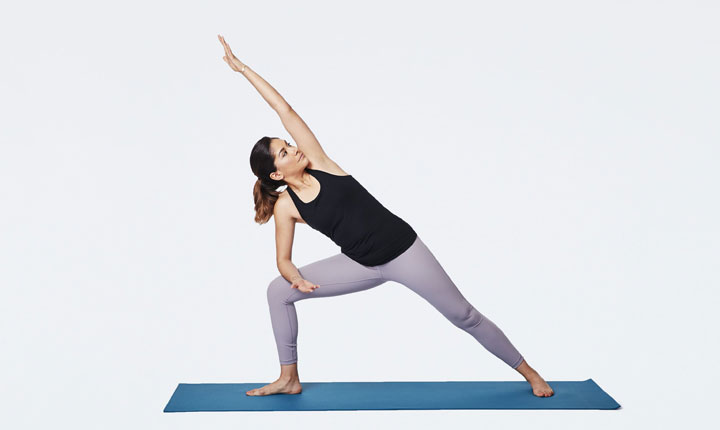
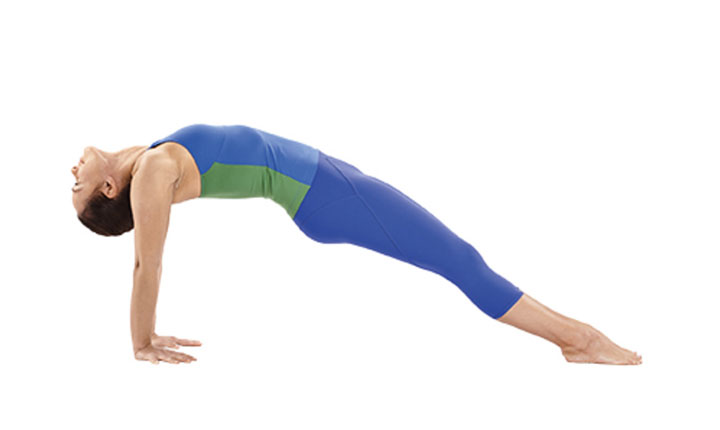
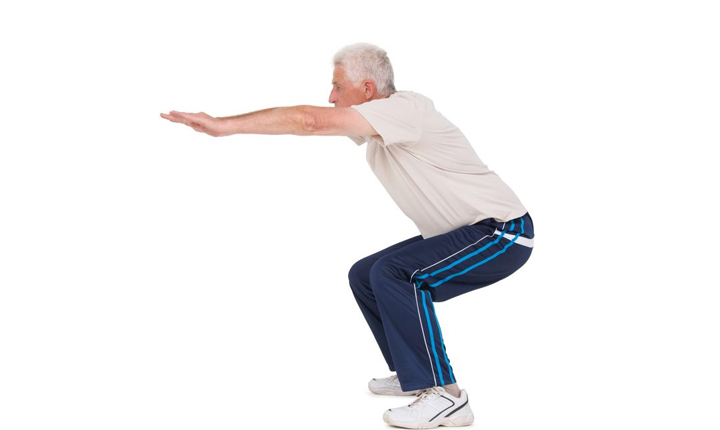
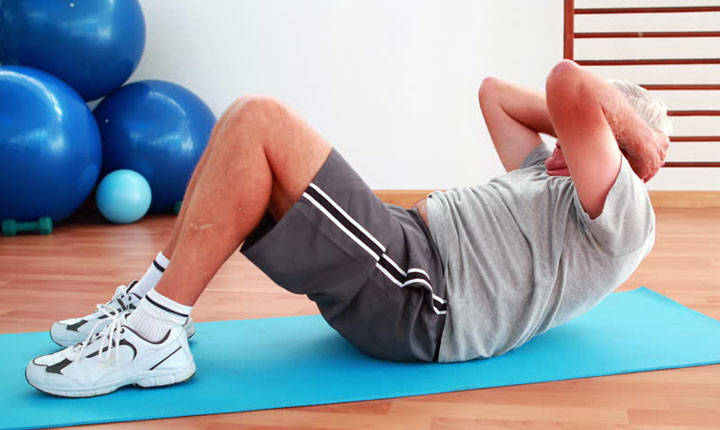
  • Your Own Body Weight: Chin-Ups, Push-Ups, Squats, and many other exercises. Body weight exercises are best if you are traveling or at work.
  • Medicine Balls: Balls with Weight.

Most Important Parameters of Resistance Training

Resistance training, like any other exercise, is all about precision. A little mistake can be lethal for your health. Thus, we are mentioning a number of parameters that are needed to be followed during your resistance training workout session.

Choose the Correct Exercise

Every exercise has its perks and drawbacks. Similarly, some exercises can help you build muscles way better than the others. This is the reason why you should always be aware while choosing an exercise. In order to reap the maximum benefits from the resistance training, you need to choose the exercises that are multi-joint in nature. By multi-joint, we mean the exercises that work on more than one joint. In the multi-joint exercise, muscles that are attached to the joints either lengthen or contract.

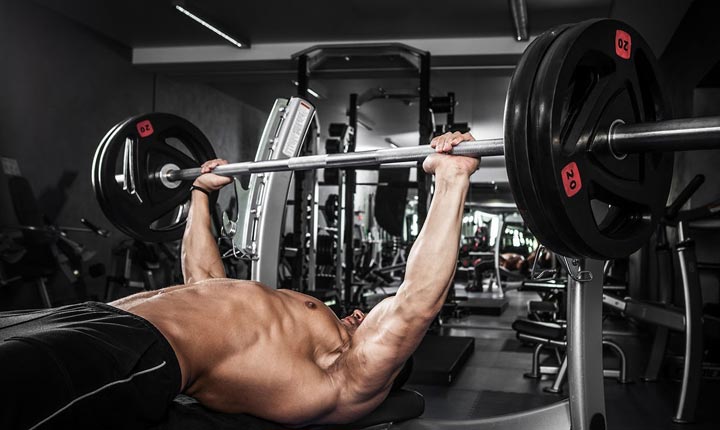
Multi-joint exercises are way more beneficial than the single-joint workout but also are more difficult! For instance, if you compare dumbbell fly with the bench press, you would find that the single-joint exercise, dumbbell fly is easier to perform but multi-joint workout, bench press (works on elbow and shoulder joints) is more difficult. But at the same time, the latter is way more effective than the former.

It’s good to start with a multi-joint workout for warm-up and if you have plans for single-joint exercises, keep them for the end of your workout.

Choose Proper Weight

choose proper weight

Once you are done with the warm-up, you need to pick a weight that helps you reach your target rep, having you in a good condition. By good condition, we mean completing the rep without having to cheat the weight up or something like that. That’s neither a clean rep nor healthy for you. In order to complete the target reps in good forms, you have to pick the right weights or you may not ever finish the target reps!

If you are a beginner, don’t jump into the heavy weights. Use such weights that allow you to reach your target reps in good form for the first couple of weeks to get habituated with the strength and stamina it requires. After that, you will become more coordinated and feel the extra strength in you. Once, you are adapted to the moderate rep ranges, you can, then, challenge yourself for moving to the heavier weights.

The key mantra: Never lift heavier weight at the expense of your form.

Do Multiple Sets

Do multiple sets of exercise

Multiple sets of an exercise are one of the key parameters when it comes to resistance training. However, you should not count the sets in warm-up because, as you can see, it’s not actually an exercise. You are just warming up your muscles and tissues to get ready for the main job! However, this does not mean that you can just skip the warm-up part to get straight into the main exercise. The warm-up helps in making your body ready for the next big tasks. Without warming up, you can never reach your potential max weight.

Now, the question is, if warm-up reps are not counted, how many sets should get the job done? Well, a single set is also beneficial but if you truly want to reap the benefits of the resistance training workout, you need to do 3-4 sets. That will tune your muscles way finer than one single set.

Take Rest Between Sets

Take rest between sets

Muscle failure is quite normal in the workout. By design, muscle failure happens when your muscles reach to the most extended form and are unable to complete another rep in the good form. With the right weight chosen, the muscle failure occurs after around 8-12 rep range. Your muscles need to clear lactate and hydrogen ions (metabolic byproducts) as they fatigue during a set, which requires a little time, around 90-120 seconds. While the smaller body parts like arms and calves would take a shorter time to recover, the larger muscle groups like back and leg may take a little longer. Then, how to know when it’s good to go! Well, you can understand when you can catch your breath and feel good to go again.

Go the Extra Mile

Put Extra Effort

So, if you keep exercising properly, have healthy food, get a good supplement, and rest properly, it pays off by letting you have the growth in muscle size and strength. Along with the increased strength and bigger muscle fibers, you would be able to do more than you used to do at the very beginning. Instead of doing 10 bicep curls, you may do 12 now or even 13-14! But instead of doing 13-14, one smart way is to add more weights in the bar in order to take your resistance training to the next level (since you are putting more resistance from now on). Now, complete your target range with the increased resistance. The idea is to get out of the comfort zone and make improvements on a regular basis.

Conclusion

So, this is all about resistance training. You need to remember all the parameters that we have mentioned in order to reap the maximum benefits from this outstandingly working exercise technique. Resistance training is the best way to make yourself stronger and more durable. So, follow these guidelines and start your workout. However, we would suggest taking advice from your trainer or a reputed multi gym before beginning the training since they would better understand your health and requirements.

Learn How to Increase Immunity with Exercises

Learn how your small efforts can boost your immunity and stop you from getting sick with these simple immunity-boosting exercises.

Having a chiseled body with six-packs or the perfect waist size is of no use if your body can’t defend itself from disease-causing microorganisms. The ability of your body to protect itself from germs and microbes depends on how strong your immunity system is. This is why it is of utmost importance that you pay special attention to learning how to boost your immunity; and one of the ways through which you can remarkably improve it is with the help of various exercises. This is what we are presenting to you today.

Tips to Increase Immunity by Exercising Properly

Exercises help us in not only staying in shape and maintaining our fitness level, but they also provide a protective layer that shields us from getting sick. However, just because they have the potential to boost your immunity doesn’t mean that you have to overexert yourself by exercising too much since it will result in you injuring yourself. Reaching the optimum level between no exercise and too much exercise is the key to staying healthy.

The fact of the matter is that immunity-boosting exercises are moderate by nature and don’t require a herculean effort. This means that they can be performed by almost anyone. It should be noted that in order to develop a strong immunity, the main focus shouldn’t be on the type of exercises, but rather on developing a bunch of habits that will help you reap the most benefits from your exercising efforts.

With the groundwork being laid in front of you, it is time for us to introduce you to the guideline that you need to follow to boost your immunity. Especially, when coronavirus has become a global concern, you need to know about these exercises to improve your immune system as currently the only solution for coronavirus is a strong immunity that can fight and defeat the killer viruses.

Understand What Your Body Can Endure

Body Endurance

Everyone’s body is different. Naturally, the needs and requirements of your body will govern the type and amount of exercise that you can do.  

This calls for getting a medical consolation at the first stage. It will help you learn about your body better, and when you know your strengths and weaknesses, you will be in a better position to plan your workout regime.

A certified medical practitioner will help you realize when is the apt time for you to exercise, or how much you can afford to push your body without jeopardizing it, among others.

While talking to your doctor regarding your intention to boost your immunity, make sure that you are completely transparent regarding your medical history. Inform him or her about any past injury or allergy or family health issues since all of these can harm your health.

However, don’t think that having any of these health issues will stop you from boosting your immunity. It is just that your workout sessions will look a bit different from others.

For instance, people who have asthma or any record of attacks such as heart stroke, heatstroke, or have been through any accidents that have affected their limbs or internal body parts, they might have to take a different route than others when it comes to designing their workout plan.

Exercise on a Regular Basis

Regular Exercise

Most of us have an extremely tight schedule in our daily life and we look for an easier and convenient routine for exercising. Many people simply pick one or two days of exercising in a week. Unfortunately, this is too little of an effort to boost your immunity.

We recommend you to take out 30 minutes every day from your schedule and allot it to exercising. Besides, you don’t even have to go for seven days a week. If you exercise for half-an-hour daily for five days a week, that will bring the total to 150 minutes of exercise weekly, which is enough for strengthening your immunity system.  

You can use a smartphone app or a journal to keep track of how much time you are exercising every day. As we stated earlier, simple and moderate exercises will be enough to reach your desired goal. So, opt for biking, brisk walking, or swimming. In fact, activities such as playing outdoor games with your friends or kids, or even mowing your lawn can contribute towards boosting your immunity.

For those of you who are already involved in vigorous physical activities as part of their household chores or professional work, you don’t even have to give any additional effort towards exercising.  

Plan Your Workout Regime Properly

Plan Workout Regime

In our next lesson on how to boost your immunity, we will guide you to plan your workout regime. In continuation of our previous point of finding time for exercising in your busy schedule, let us help you out even more.

You don’t have to exercise for a continuous 30-minute period.  In fact, breaking down your exercise routine into small manageable chunks will not only help you save your time but will also prepare your body to gain immunity effectively. So, here’s what you can do.

Break the 30-minute exercise time into three 10-minute chunks. So, you can allot 10 minutes each for your morning, afternoon, and evening routines. For instance, you can jog for 10 minutes in the morning, then go for cycling or swimming in the afternoon for 10 minutes, and finish up by going for a brisk walk session in the park or your terrace in the evening for 10 minutes.

It has been seen that if you choose to workout continuously for a longer duration of time, it has the opposite effect. It ends up weakening both your heart and your lungs, making you extremely vulnerable to various diseases. Longer exercise session also increases the cortisol and norepinephrine levels in your body, which, in turn, suppresses your immune system.

You have to learn not to overestimate the abilities of your body.  If you suddenly start training for a marathon or perform high-intensity cardio or strength-based exercises, not only will you minimize your chances of boosting your immunity, but you will also harm your body.

Light Exercises are Good During Illness

Light Exercises During Illness

Of course, there will be days when you will be sick. So, does that mean you should stop exercising completely?

Well, it depends! You need to assess the situation your body is going through. To do that, look for a couple of factors.

First of all, check whether your symptoms are “above the neck” (nasal congestion, runny nose, sore throat, sneezing, etc.) or “below the neck” (aching muscles, fever, upset stomach, chest congestion, lower back pain, overall fatigue, stiff neck, etc.).

If your symptoms are “below the neck”, take a break from exercising that day. If the symptoms are “above the neck”, you can perform the exercises, but make sure you reduce their intensity. Having the self-awareness as to when your body can take it and when it demands rest is crucial in maintaining proper health.

This means that if you usually run in the morning, try brisk walking when you are sick. In the same line of thought, if you generally swim in the afternoon, try going for a light cycling session when you are sick.

At the end of the day, you are trying to boost your immunity to safeguard yourself from diseases. So, if you don’t protect your body when you are actually sick, your entire workout regime will go in vain. So, assess, plan, and act accordingly.

Warming up before exercising is always important, but its need is realized even more when you are sick. So, while warming up your body through free-hand exercises, if you notice that you are experiencing chest pain, difficulty in breathing, muscle spasms, or if you are feeling light-headed, among others, you immediately have to stop.

A Little Rest Also Helps in Boosting Your Immunity

Rest Helps in Boosting Immunity

Do you know why gym trainers recommend everyone to take at least a day off every week from exercising? No, they don’t do it simply to allow yourself to catch up on the latest TV series on Netflix or to grab some tacos in a nearby restaurant. They do it because your body simply requires rest.

Besides, you need to allow your body to gain the benefits of the exercises you have been doing the entire week. To do that, you need rest. So, make sure that you have 1-2 days in a week where you are not performing any immunity-boosting exercises.

Eating healthily will also multiply the chances of these exercises having positive effects in boosting your immunity. So, include lots of fruits, green vegetables, whole grains, nuts, dairy products, and meat to gain all the necessary vitamins and minerals for strengthening your immune system.  Don’t forget to hydrate yourself and drink 8-10 glasses of water every day.  Also, limit the consumption of alcohol and caffeine-based beverages as much as possible.

These habits when clubbed with exercising will go a long way in helping you achieve your desired goal.

Final Thoughts

Boosting your immunity should be one of your priorities when exercising because everything else won’t matter if your immune system is weak and is unable to save you from frequently falling sick. As you have seen, you don’t have to unleash your beast mode to strengthen your immunity. Simple steps can help you build a strong foundation.

So, get in your sweatshirt, bring out your workout gear, hit a multi-gym near you. We, at Starmark, are always ready to help you boost your immunity and live a healthy life, free from the danger of diseases.

Losing Weight with the Power of Yoga

Don’t want to deal with the high-end machinery to lose weight? Embrace the age-old natural way of yoga exercises to lose weight healthily and effectively.

If you go online, you can probably find a dozen different ways to lose weight, but none can be as natural and free of side-effects than yoga. With an existence that has lasted millenniums, this naturalistic fitness routine helps you manage your weight efficiently.  Most other weight-loss methods and treatments bring with them their own baggage. Some are not suitable for people with injuries while others are not flexible to all age groups. With yoga, all these barriers are cut off because of its universal nature. 

Therefore, today, we bring before you some of the most effective yoga exercises that will help you lose weight.  

Yoga as an Effective Weight Losing Method

Contrary to popular belief, yoga isn’t only performed to gain spirituality and to increase flexibility.  There is hardly an area of your body that it doesn’t cater to. Why else do you think it has become so popular not only in India, which is its origin but across the globe? You can find a yoga center in almost any populated place now. Its appeal lies in the bunch of benefits it provides, one of them being weight-loss.  

Weight loss is a sensitive process. You have to be healthy about it. Vigorous or excess body weight loss can lead to various health hazards. This is why yoga is so reliable. It neither believes nor promotes dramatic weight loss. It allows your body to adjust to the change of weight, which is crucial for staying healthy.  

The exercises that we are mentioning here today will help you naturally lose weight. However, these exercises are not one-trick ponies. They have other benefits as well. From helping you develop perfect abs to helping you sleep better, they do it all. So, this means you will invariably bless your overall body in your journey of losing weight through yoga.

Best Yoga Exercises to Lose Weight

Although many yoga exercises will help you lose weight, we have listed just the best and most effective ones among them. They are as follows:

Seated Forward Bend Pose

Seated Forward Bend Pose

Start this exercise by sitting on a mat with your feet straight in front of you. Follow this up by pressing your top thighs down the floor. As you press them down, make sure the top of your sternum is lifted towards the ceiling.

Next comes the leaning part. You need to ensure that you lean forward from your hip joints instead of your waist.  Also, keep in mind that your inner groins have to be drawn deep into your pelvis before leaning.

Now, initially it might be a bit difficult to lean forward completely. So, you can use a strap around your foot soles and use it to lean forward. Once you are used to it, simply touch the sides of your feet with your hands and lean forward.

Your head must be raised and your front torso must be lengthened into the pose. The sequence that you need to follow is to make your lower belly touch your thighs first, followed by your upper belly, then your ribs, with your head touching the feet last.

Hold this pose for around two minutes, although for beginners 30 seconds will suffice.  To come back to the starting position, you need to lift your torso away from your thighs. Don’t forget to straighten your elbows as well. While lifting the torso, keep inhaling and pulling the tailbone into your pelvis.

Warrior II Pose

Warrior II Pose

Stand up and keep your legs 3-4 feet apart from each other. After that, lift your hand parallel to the ground and reach out to your sides with your palms down and shoulder blades widened.

Make sure to align your right heel with your left heel. Next, you have to bring the center of your left ankle in line with the center of your left knee cap. To do this, you need to turn your left thigh outwards.

Proceed to bend your left knee over your left ankle and don’t forget to exhale while doing so. This ensures that your shin is perpendicular to the ground. Based on your comfort level, bring your left things as parallel to the ground as you can.  You then have to strengthen your right leg to anchor the movement of your left knee.

Keep the sides of your torso long and ensure that your shoulders are directly over your pelvis region.  Your arms must be stretched away from the space created between your shoulder blades.

Stay in this position for 30-60 seconds. Keep inhaling while you come up. Repeat the process with the other feet as well.

Extended Side Angle Pose

Extended Side Angle Pose

This has a lot of similarities with the previous exercise, with a few exceptions. Much like the previous one, start by simply standing with your legs 3-4 feet apart from each other. Lift your arms parallel to the ground and reach out to your sides with your palms down and shoulder blades widened.  

Here comes the exceptions part. Bring your left hip forward towards the right while rotating your upper torso to the left side. Next up, raise your inner left groin deep into your pelvis. You then have to bring your inner knee towards the left side of your foot.  Try to keep your right thigh parallel to the ground here.

Now, you need to raise your left hand towards the ceiling. After that, bring your left palm towards your head. Slowly inhale, and try to reach the arm over the back of your left ear.  The entire left portion of your body has to be stretched which means right from your left heel to the fingertips of your left hand. While you are at it, face your left arm. Your right thigh should stand parallel to the ground.

Hold this pose for 30-60 seconds and inhale to come up. Don’t forget to repeat the same process on the opposite side now.

Upward Plank Pose

Upward Plank Pose

Sit with your arms behind your hips and put your feet on the ground while bending your knees. Next, place your feet on the ground. At the same time, bring your big toes inwards.

Proceed to press down your hands against the ground and get your hips in a reverse table-top position. Your arms and shins should be perpendicular to the ground while your thighs and torso should be parallel to the ground.

Next, one by one, straighten both of your legs. Raise your hips, but don’t harden your butt. Your shoulder blades must be pressed against your back torso. Put your head back without compressing the back of your neck.  Hold this position for 30 seconds.

Boat Pose

Boat Pose

Begin by sitting with your feet laid straight in front of you.  Strengthen your arms by pressing your hands on the ground. Make sure that your fingers are pointed towards your legs.

Follow this up by lengthening your torso between the top sternum and pubis. You then have to sit on the “tripod” that lies between your tailbone and your two sitting bones. Next, angle your thighs at 45-50° to the ground while bending your knees. You then have to lift your legs off the ground.

Try and stretch your arms parallel to each other. If you can’t keep your hands in the air, then just keep them in the ground beside your hips. This is especially true for beginners.

Don’t harden your lower belly, but keep it firm though.  Keep breathing and lift the top sternum by pressing the heads of your thigh bone to the ground.  During your initial trials, hold this position for 10-20 seconds because it might cause intense feelings in your stomach and that is completely understandable. We don’t expect you to master it in a week or so. But as you get used to it, increase the time to around a minute.

Final Thoughts

Yoga helps develop your body and mind in a way that no other form of exercise can. Besides, its lightweight nature makes it extremely relaxing, which is in sharp contrast to let’s say, a high-intensity workout, which sometimes can be daunting for people to get used to.

Although yoga can be done at the comfort of your home, we recommend you get consultations from certified yoga practitioners. Nowadays, almost all of the best multi-gyms have dedicated yoga sessions because of their high potential. The fact that while losing weight with yoga, you are inadvertently contributing to the overall development of your entire body is in itself a reason enough for you to start this beautiful experience.

At the end of the day, the goal shouldn’t be just losing weight. It should be losing weight healthily, which is what yoga is all about.

7 Home Exercises for Seniors to Resist Diseases and Injuries

Maintain your health and fitness even at home in your older age. Know about 7 best home exercises for seniors that are risk-free and need no equipment.

Every individual loves to lead a healthy lifestyle but many people don’t achieve a healthy life just because of their bad habits. But you need to seriously consider your health since the health is truly the wealth we have got. When it comes to older adults, health is even more important since their organs and the immune system becomes weaker than young people. But we can understand that not every senior can leave home and go to a gym and start exercising there. That is the reason why we are here with the best home exercises for seniors that would help them stay fit and healthy.

According to the fitness experts across the world, 30 minutes of daily exercise is one of the key factors for a healthy lifestyle irrespective of age. Physical activity on a regular basis keeps heart and bones strong which means you will have better flexibility and strength even at your old age! Moreover, fitness exercises can also boost your mood to keep you energetic and stress-free. For older adults who are losing muscle mass, a few exercises can improve your lost balance and mobility. Therefore, the fitness exercises mentioned in our article need to be practised by old individuals in order to keep themselves healthy.

7 Best Home Exercises for Seniors

Due to the massive coronavirus pandemic, we have been caught at home without going out. However, many older adults often stay at home without going out. For them, this article will be a great assistance since we are going to talk about only those exercises that can be practised and performed from the comfort of your home. So, if a senior is reading this guide, read carefully and practice these workouts at home. And if any younger adult is reading, you can also practice these workouts and/or you can refer these to your older family members. So, without wasting a single second, we are going to jump to the exercises. Let’s go.

Yoga

Yoga for Seniors

Quite obvious and hugely effective, yoga is probably the best way to stay healthy for people of any age. When it comes to seniors, there’s no better home exercise than yoga since it does not involve any strength-based activity like lifting which can cause harm or an injury. Performing a few yoga poses at home can make your body stable and healthy as well as make your mood refreshed and stress-free. However, those who have never done yoga are highly advised to do that with someone who has a little acquaintance with the yoga. That way, you can get the gentle support and balance throughout your poses which is highly required. Make sure you are not doing highly complex yoga poses which need a high level of flexibility since it can harm your muscles.

You can always consult a professional regarding the yoga poses you should try at home. When done properly on a regular basis, yoga can lift your mood along with your physical flexibility. And that makes yoga an outstanding exercise for seniors to do at home.

READ MORE: Best Yoga Workouts for Getting Toned Abs

Light Weight Training

Home Exercise for Seniors - Light Weight Training

The light weight training is one of the best home exercises for seniors as these workouts are proven to develop the bone density and muscle mass which start weakening along with growing older. With the light weight training, you can not only put on the much-required muscle mass and bone density but you’d also be able to avoid the undue stress on your muscles. Exercises like Arm Raise or Shoulder Press are great for older adults with 2 pounds of weight. Okay, we understand that not everyone has weights at home. In that scenario, you can use home-based objects like food cans or water bottles to replace the weights and get the same benefits.

If a senior needs assistance with the workouts, there are personal trainers available (also at Starmark) who are trained to assist an older person to workout effectively without any harm. In a nutshell, light weight exercises are one of the best home workouts for seniors.

Aerobics

Aerobics - Exercise for seniors at home

Aerobics is another home-based exercise for seniors that would help them stay fit and healthy. You do not actually need a gym membership in order to perform aerobic exercises since you will get a lot of DVDs and online videos that would help you follow a routine in the best way possible. If you are worried about your age, let us tell you that many videos are dedicated to the seniors only; so, you don’t need to worry about the outcome of watching videos and practicing aerobics at home. However, we still would advise you to consult a fitness expert or your physician before starting the aerobics workouts at home considering your age.

There are a number of classic aerobic exercises available on the videos like knee lifts or jumping jacks (Watch Video) which will help your heart pumping and improve the cardiovascular health.

Walking

Walking - Senior's home exercise

One of the simplest, commonest and more effective home exercises for seniors, walking works tremendously well to keep an older adult healthy and active. This cardiovascular exercise does not have to be done outdoors (as it normally happens); you can also walk inside the home during their time at home. Those who have large homes can always walk around the home for some time on a daily basis and those who don’t have the luxury of such large home can also walk on the passage or rooftop. Moreover, you can also get a treadmill and walk on that. But in that case, always ask someone to stay with you who knows about the treadmill and how it works (in case you don’t have any idea or anything goes wrong with the machine).

Walking indoors provides the same benefits just like walking on roads or ground. Apart from the fresh air, you would always burn calories and pumping up the heart rate. If you want a little more intensity to be added in this wonderful home workout for older adults, using the staircase is a great option.

Chair Exercises

Chair Exercise for Seniors

It’s quite natural to lose mobility at an older age. But if you want to increase your mobility and prevent the falls, it’s absolutely necessary to strengthen your lower body. Chair exercises are one of the best home exercises for seniors that can help you with a strong lower body. Not only a firm and strong lower body but the chair exercises also provide more support to the seniors since they can use the chair. So, unlike many workouts, older adults can do it without any assistance. Perfect for stretching joints and tight muscles to ease the pain, the chair workouts can be performed even while watching TV! From Seated Leg Lifts to standing toe raises, the workouts are simply comforting for a person of old age. And this very aspect makes it one of the best workouts for seniors to do at home.

Squats

Exercise for Older Adults - Squats

If we talk about lower body strength, squat would never stay back from being mentioned in any list! One of the most celebrated strength training throughout the globe, Squats can also be the best home exercise for seniors due to the fact that this workout can help them with stronger muscles throughout the lower body. In order to perform this workout, point your toes forward while standing straight. Now, you need to bend your knees to go to a near-seated position and then get up to the first position. Repeating this process completes the workout. Your physician and your physical strength would determine the number of sets and reps you should do. Squats help you with gaining muscle mass on the quads and calves.

You may face balancing issues while performing this amazing home workout. So, it is advised to take a support like a chair. You can also ask somebody to be there with you while you are performing the workout. Despite the effectiveness of Squats for the seniors’ health, it’s highly recommended to always ask your physician whether you should perform this exercise as it is a strength-based workout.

Sit-Ups

Older Adult Exercise at Home - Sit-Ups

Back pain and poor balance are two of the most common sides of an older adult. Thus, sit up makes it to our list of the best home exercises for seniors for its ability to provide strong core muscles that improve balance and reduce back pain. Also, if you practice Sit-Up, it would lessen the risk of injury, which is quite common in the older people. Just like the other exercises, we would ask you the same thing: consult your doctor or physician before practicing this home workout despite its benefits.

To perform Sit Up, lie down straight on your back with your knees bend at an angle. Now, place both of your hands behind your head and pull your head up gently without moving your buttocks. And then get back to the same position. Repeating this process will work on strengthening the stomach muscles which is a great boon for the health of the seniors.

Caution for Performing These Home Exercises for Seniors

These exercises are really effective without any doubt. But as we have mentioned in every single exercise, always consult a doctor or physician before starting these workouts. These home workouts are great for older adults but these are also capable of causing an injury. So, consulting an expert before and during the exercises is the best way to reap the benefits of these exercises without getting injured in the process.

Concluding

Home exercises for seniors are the best way to keep older adults fit and healthy during their time at home. With these home-based workouts, you can not only stay fit physically but your mental health will be boosted. You will feel energetic and there will be less chance of being sick. So, follow these exercises to become healthier than ever in your old age.