Yoga Poses that Remove Stress and Anxiety

Get into the calm and cool mindset by eliminating stress and anxiety from your life with the help of these relaxing yoga poses that will remove your stress.

Living in this fast-paced and highly-competitive world is no mean feat. In the race of staying ahead of your competitor, often we are plagued with stress and anxiety, both of which can not only take a toll on our mental health but on our overall personality as well.

Whether you are a young adult student or a housewife, whether you are the corporate manager of a well-established firm or a senior citizen looking ways to spend his or her free time after retirement, stress and anxiety can propel in anyone and everyone.  These issues can carve a void in your head that will simply diminish your ability to excel in life. Thus, it is crucial to fight them off at an early stage with some self-help; and what better way to kick them off other than doing some relaxing yoga from the comfort of your home?

Benefits of Yoga in Fighting off Stress and Anxiety

Yoga helps in curbing stress and anxiety by helping you relax. It makes you present in each pose, thereby increasing your concentration and power of control over yourself.  This eliminates any negative mental chatter that is bothering you, thereby elevating your overall mood.

It has established by multiple types of researches that just devoting a few minutes of your day to yoga can have major positive impacts on your life.

Yoga is not just a stress reliever. It can pave the way for easing out anxiety, and even depression.  When you are performing yoga, your attention and focus are transferred to your breath and body. As a result, physical tension is released and anxiety is tampered down. In fact, yoga can also help us in getting good sleep.

We understand that getting into the calm-cool-composed mindset of yoga can’t be mastered in a single day. Take your time! Slowly and steadily, you will get there. You have to permit yourself to fail. Don’t aim for perfection.  Just accept yourself and all your essence.

6 Best Yoga Poses for Removing Stress and Anxiety

Millions of people across the globe suffer from anxiety, making it one of the most common mental illnesses. Today, we are listing out a couple of yoga poses for removing this mental health issue from your life.

However, don’t think that these poses are only for those who have been diagnosed with an anxiety disorder. The truth of the matter is that most of us don’t get our mental health checked. So, you never know whether you are already suffering from excess stress, anxiety, hypertension, among others, or not. It is better to take precautions than cure.

Our bodies can heal and function effectively on its own, but the numerous stressors in our life can slow down, and sometimes even stop this natural healing process. Through the help of the following yoga poses, you can dissolve these stressors from blocking your body’s natural healing system.

Yoga not only provides us physical benefits but mental benefits as well. Here’s presenting the yoga poses you need to try to get rid of stress and anxiety:
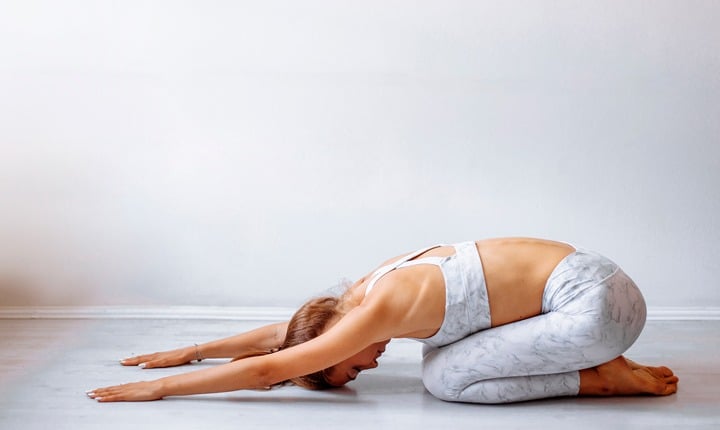
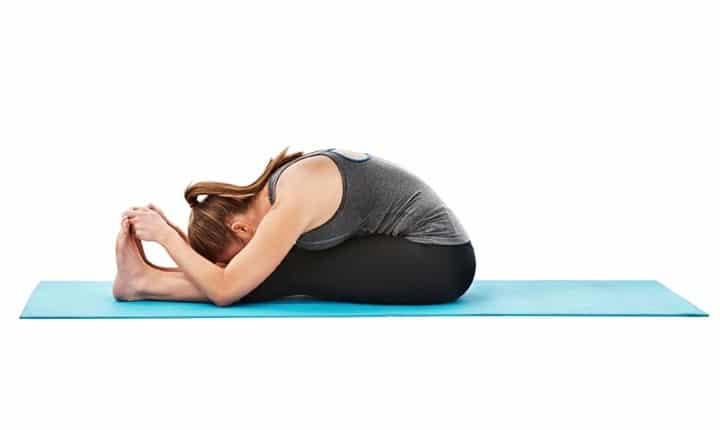
Child’s Pose

Child’s Pose

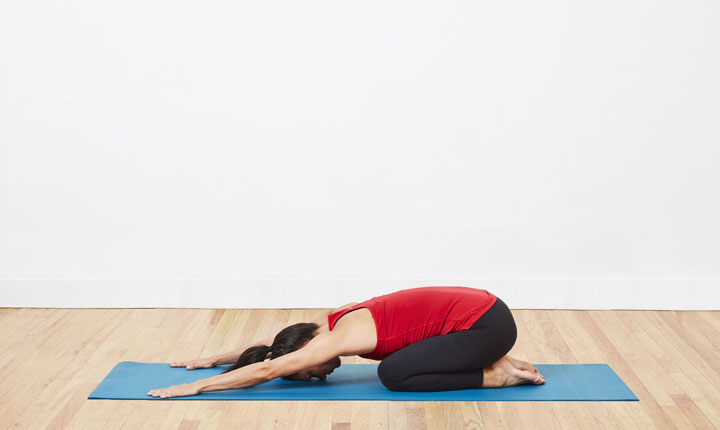
The child’s pose helps relax your stress and fatigue level. It focuses on your hamstrings, rotator muscles, gluteus maximus, and spinal extensors.  

To get into this pose, your first have to sit on your knees and sink back onto your heels. Follow this by bending forward while keeping your arms forward. You can also choose to keep the arms by your side if that suits you. Rest your torso on your thighs and your forehead on the ground. Try holding this pose for around five minutes.

This pose is extremely comforting and has soothing effects on the human mind.
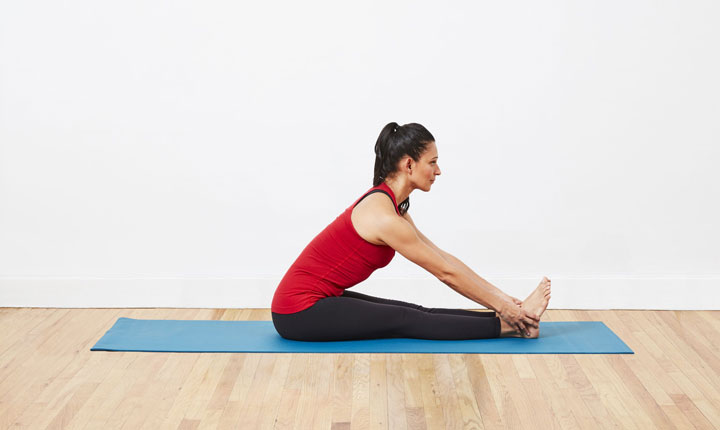
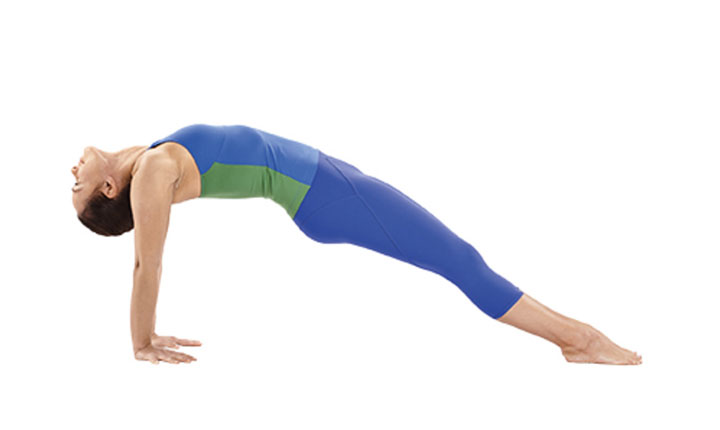
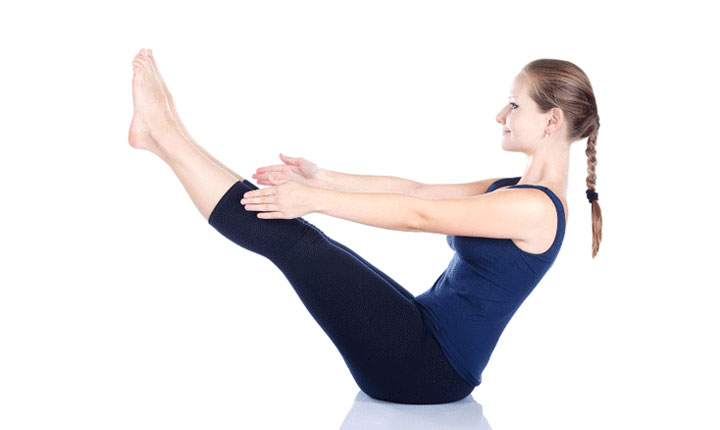
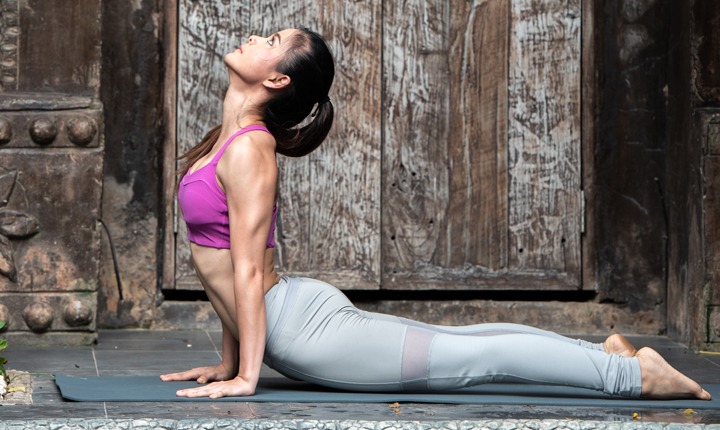
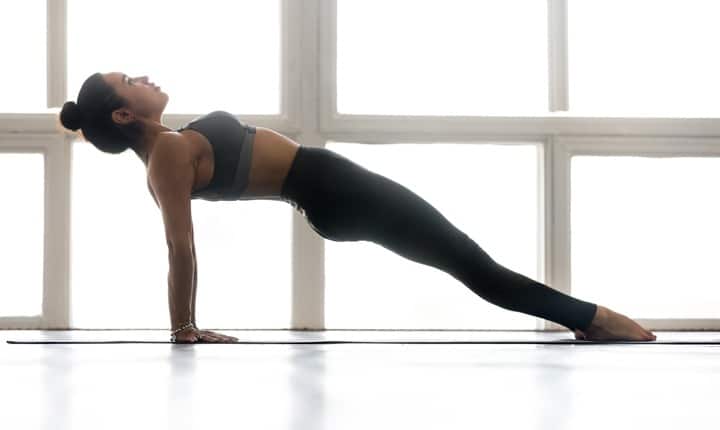
Fish Pose

Fish Pose

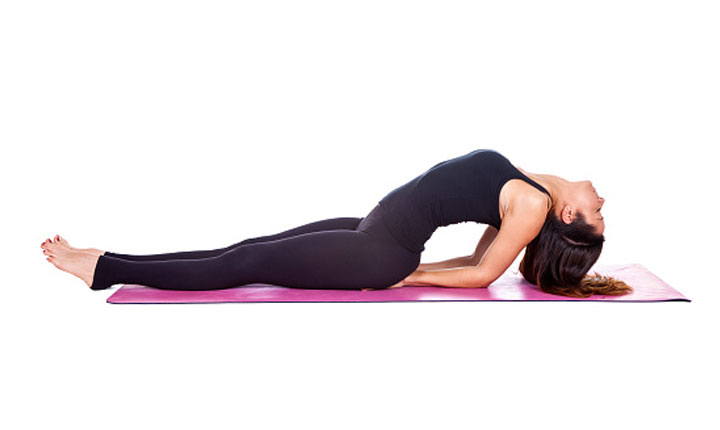
Sitting in front of the computer wreaks havoc to your posture, and in turn, your mood. Fish pose yoga helps in providing relief to all the tightness in your back and chest. It takes care of your abdominals, hip flexors, intercostal muscles, and trapezius.

To try this, you need to sit down with your legs stretched out in front of you. After that, put your hands beneath your butt. Make sure you keep your palms facing down.  Next, you need to squeeze your elbows together and expand your chest.  

Proceed to lean back onto your elbows and forearms. Stay lifted in your chest by pressing into your arms. If it suits you, hang your head back towards the floor. If you find this too uncomfortable, you can even use a cushion to rest your head. Hold this pose for a minute.
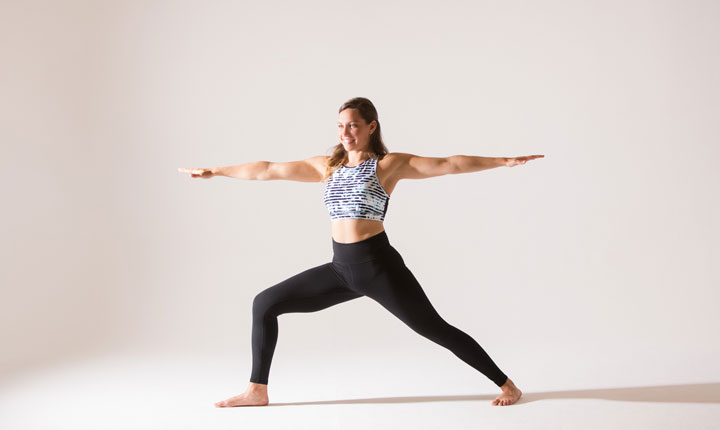
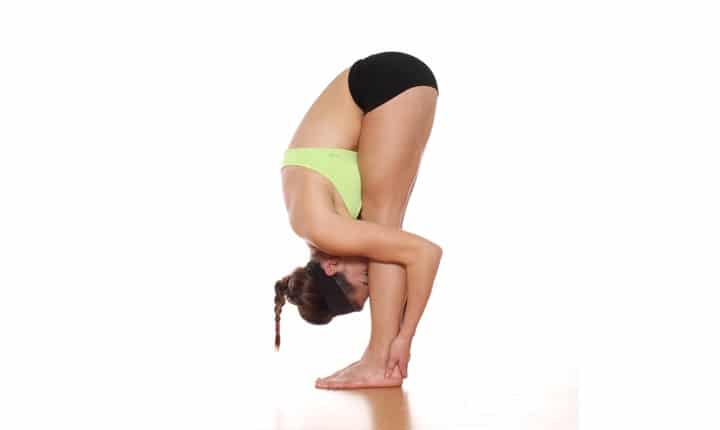
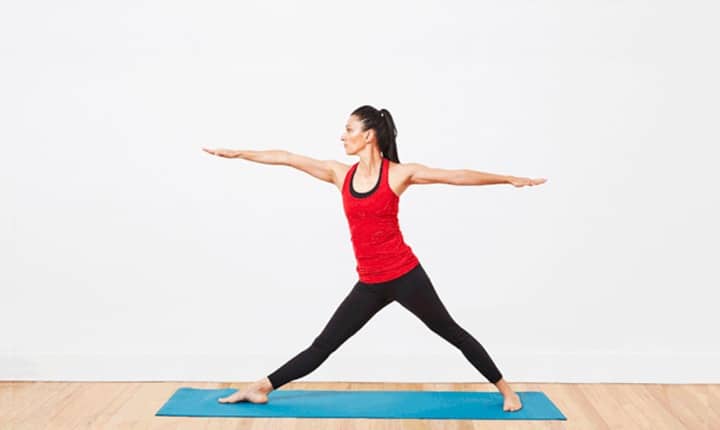
Triangle Pose

Triangle Pose

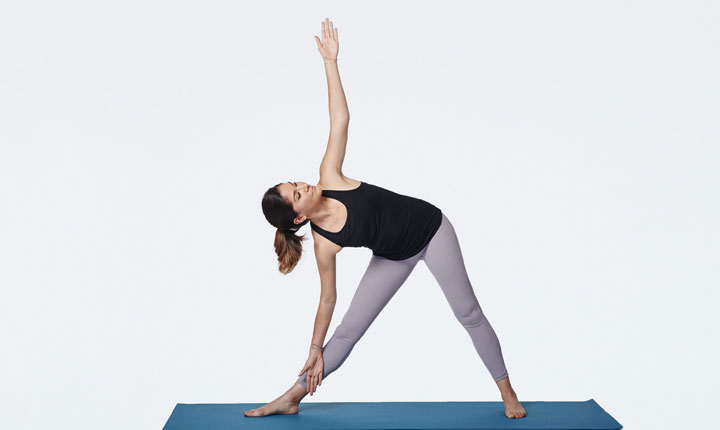
The triangle yoga pose works to ease out the tension from your neck and back by focusing on a bunch of different areas in your body such as the hamstrings, internal oblique, quadriceps, gluteus maximus and medius, and latissimus dorsi.

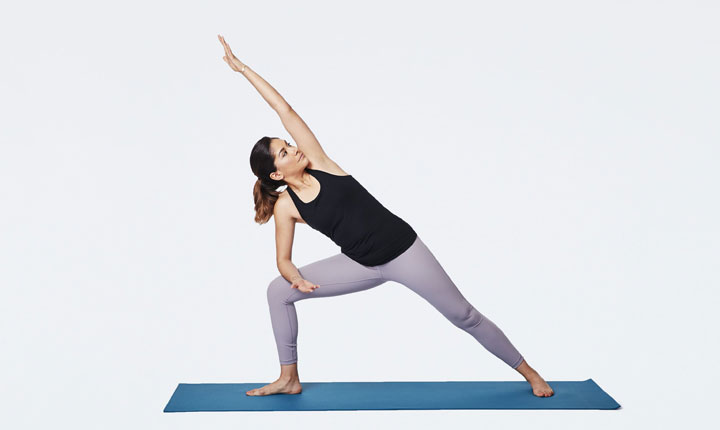
To get into this pose, stand with your feet more apart from one another than your hips. Keep your left toes forward while keeping your right toes at a slight angle. Then, raise your arms and ensure that your palms are faced down.

Next, try to reach forward with your left hand and as you do so, put your torso forward as well. Proceed to bring your right hip back by hinging at your hip joint. Put your left hand to your leg or the floor while extending your right arm towards the ceiling. Feel free to gaze at whichever direction is comfortable for you. Hold this pose for a minute.

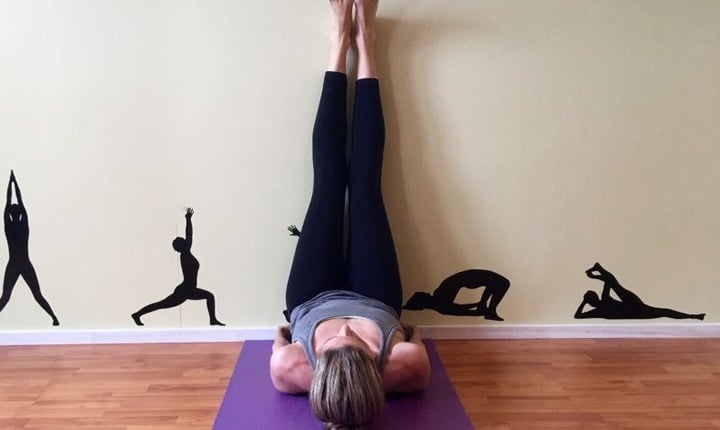
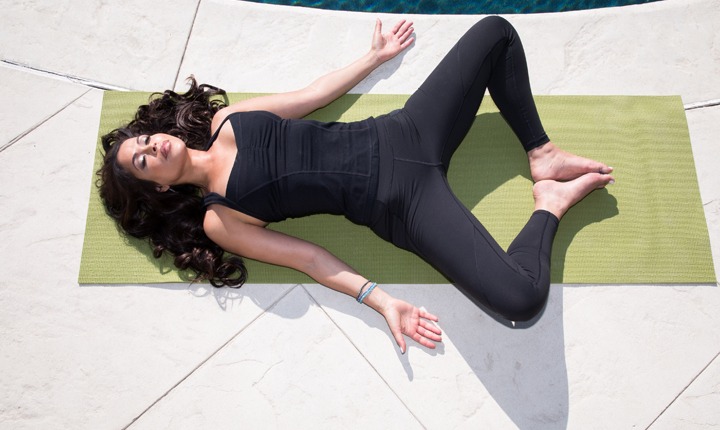
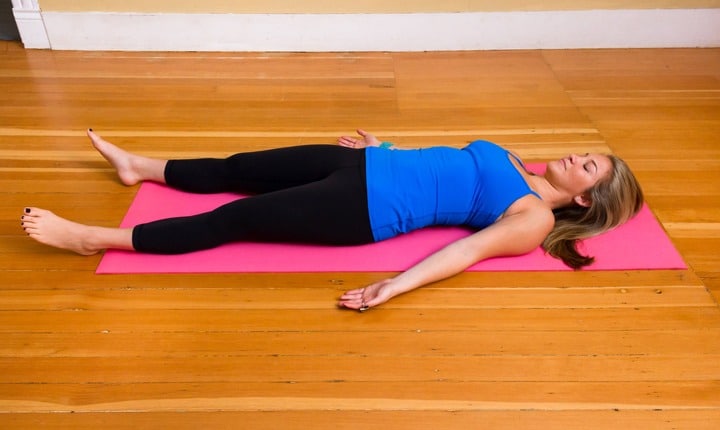
Legs-up-the-Wall Pose

Legs-up-the-wall Pose

Next up on our list of yoga poses that you need to try to get rid of stress and anxiety is the up-the-wall yoga pose. This restorative pose is extremely beneficial since it completely relaxes your mind and body.

The areas that are taken care of through this pose are pelvic muscles, lower back, hamstrings, front torso, and neck. If you are a beginner, we recommend starting this pose by sitting beside a wall. Once you get a rhythm of it, you can do it without the help of a wall.

First of all, swing your legs up along the wall and lie back.  Ensure that your butt is close to the wall. Depending on your level of comfortability, you can either keep your butt a few inches away from the wall or stick it completely to the wall.

The main idea here is to soften and relax your neck, chest and back. Hold this pose for ten minutes and de-stress yourself.
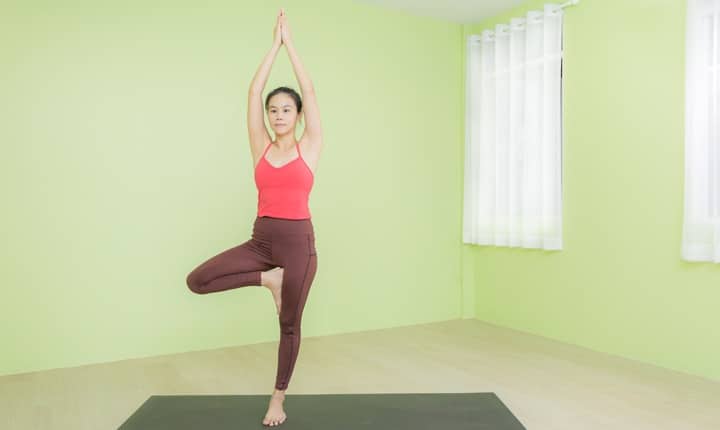
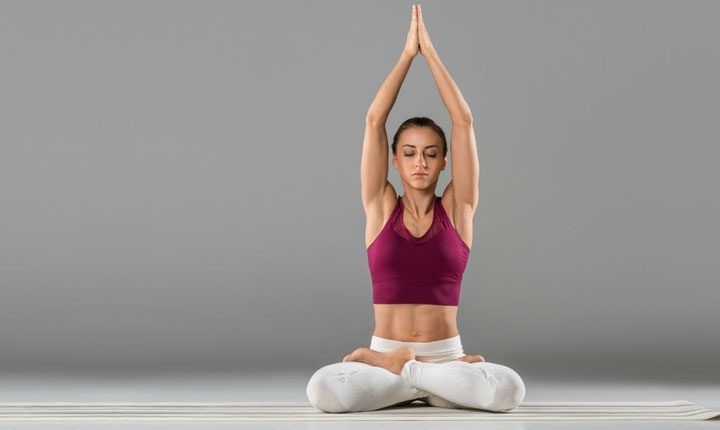
Tree Pose

Tree Pose

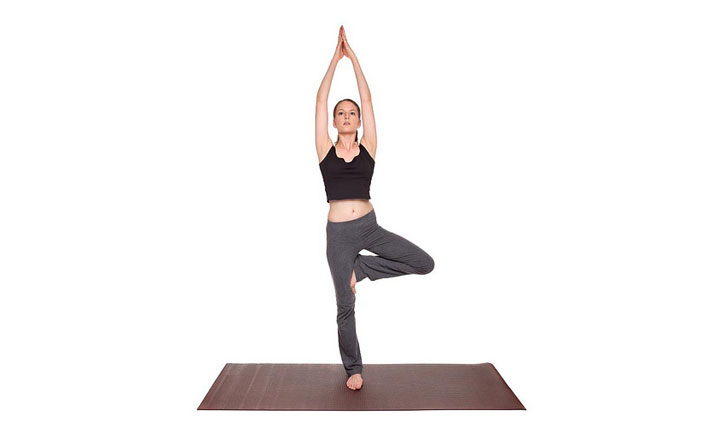
When it comes to shutting down all the fast-paced negative thoughts that keep on racing in your mind, none works better than the classic tree yoga pose.

Helping you focus inwards, this pose works on your abdominals, quadriceps, tibialis anterior, and psoas.

To get into this pose, stand up and slowly lift your right leg (you can use your left leg as well if that’s what you are comfortable in) off the floor. Next, turn your left leg’s sole towards the inside of your left leg. You then need to put it on the outside of your thigh, left ankle, or calf.

Please make sure that you don’t press your foot into your knee. Proceed to bring your hands in a prayer position. If it interferes with your ability to balance, then you can even hang your hands by your side like tree branches or in any other manner which is comfortable to you. Hold this position for two minutes and repeat on the opposite side.
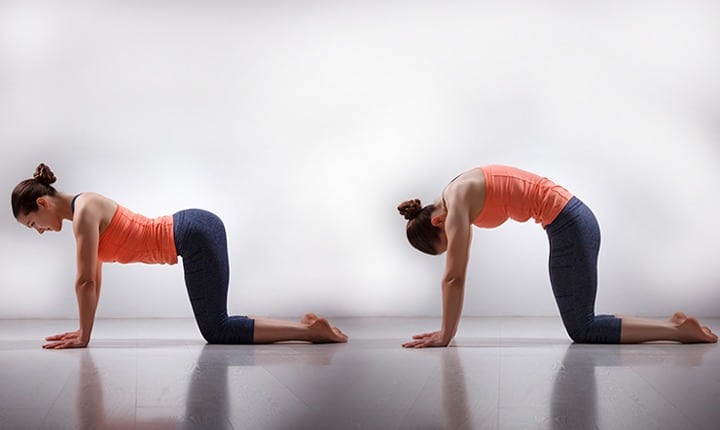
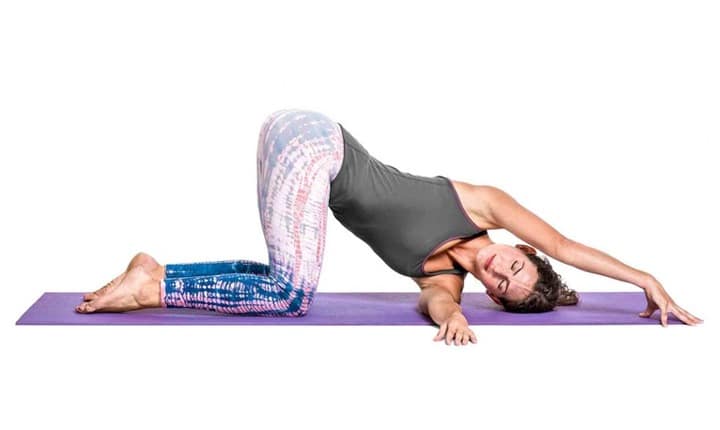
Extended Puppy Pose

Extended Puppy Pose

Next up is the half-moon pose which helps in relieving tension by lengthening and stretching the spine. It works in your erector spinae, trapezius, deltoids, and triceps.

To achieve this pose, extend your arms forward and push your butt down towards your heels. Then, engage your arms and press into your hands, all the while keeping your elbows lifted.

Proceed to put your forehead on the floor gently. Hold this pose for two minutes.

Final Thoughts

Don’t neglect your mental health. What may seem a simple case of anxiety can turn into something much more serious in the future. Remove the taboo of mental health check-ups and meanwhile allow the soothing nature of yoga to take care of your stress and anxiety.

To get the full benefits of yoga, get yourself enrolled in a certified gym such as Starmark Fitness Studio, which is considered one of the best gyms in Kolkata. Talk to our yoga practitioners and learn from them which yoga pose is suited for you and how you can achieve maximum benefit from them. It is important to learn about your own body so that you can provide it the right treatment. Keep in mind the fact that when you have proper guidance, the road to healing becomes much more convenient.

So, de-stress yourself, remove all the negative vibes and energy from your body, and tackle tension and anxiety with yoga.

Losing Weight with the Power of Yoga

Don’t want to deal with the high-end machinery to lose weight? Embrace the age-old natural way of yoga exercises to lose weight healthily and effectively.

If you go online, you can probably find a dozen different ways to lose weight, but none can be as natural and free of side-effects than yoga. With an existence that has lasted millenniums, this naturalistic fitness routine helps you manage your weight efficiently.  Most other weight-loss methods and treatments bring with them their own baggage. Some are not suitable for people with injuries while others are not flexible to all age groups. With yoga, all these barriers are cut off because of its universal nature. 

Therefore, today, we bring before you some of the most effective yoga exercises that will help you lose weight.  

Yoga as an Effective Weight Losing Method

Contrary to popular belief, yoga isn’t only performed to gain spirituality and to increase flexibility.  There is hardly an area of your body that it doesn’t cater to. Why else do you think it has become so popular not only in India, which is its origin but across the globe? You can find a yoga center in almost any populated place now. Its appeal lies in the bunch of benefits it provides, one of them being weight-loss.  

Weight loss is a sensitive process. You have to be healthy about it. Vigorous or excess body weight loss can lead to various health hazards. This is why yoga is so reliable. It neither believes nor promotes dramatic weight loss. It allows your body to adjust to the change of weight, which is crucial for staying healthy.  

The exercises that we are mentioning here today will help you naturally lose weight. However, these exercises are not one-trick ponies. They have other benefits as well. From helping you develop perfect abs to helping you sleep better, they do it all. So, this means you will invariably bless your overall body in your journey of losing weight through yoga.

Best Yoga Exercises to Lose Weight

Although many yoga exercises will help you lose weight, we have listed just the best and most effective ones among them. They are as follows:

Seated Forward Bend Pose

Seated Forward Bend Pose

Start this exercise by sitting on a mat with your feet straight in front of you. Follow this up by pressing your top thighs down the floor. As you press them down, make sure the top of your sternum is lifted towards the ceiling.

Next comes the leaning part. You need to ensure that you lean forward from your hip joints instead of your waist.  Also, keep in mind that your inner groins have to be drawn deep into your pelvis before leaning.

Now, initially it might be a bit difficult to lean forward completely. So, you can use a strap around your foot soles and use it to lean forward. Once you are used to it, simply touch the sides of your feet with your hands and lean forward.

Your head must be raised and your front torso must be lengthened into the pose. The sequence that you need to follow is to make your lower belly touch your thighs first, followed by your upper belly, then your ribs, with your head touching the feet last.

Hold this pose for around two minutes, although for beginners 30 seconds will suffice.  To come back to the starting position, you need to lift your torso away from your thighs. Don’t forget to straighten your elbows as well. While lifting the torso, keep inhaling and pulling the tailbone into your pelvis.

Warrior II Pose

Warrior II Pose

Stand up and keep your legs 3-4 feet apart from each other. After that, lift your hand parallel to the ground and reach out to your sides with your palms down and shoulder blades widened.

Make sure to align your right heel with your left heel. Next, you have to bring the center of your left ankle in line with the center of your left knee cap. To do this, you need to turn your left thigh outwards.

Proceed to bend your left knee over your left ankle and don’t forget to exhale while doing so. This ensures that your shin is perpendicular to the ground. Based on your comfort level, bring your left things as parallel to the ground as you can.  You then have to strengthen your right leg to anchor the movement of your left knee.

Keep the sides of your torso long and ensure that your shoulders are directly over your pelvis region.  Your arms must be stretched away from the space created between your shoulder blades.

Stay in this position for 30-60 seconds. Keep inhaling while you come up. Repeat the process with the other feet as well.

Extended Side Angle Pose

Extended Side Angle Pose

This has a lot of similarities with the previous exercise, with a few exceptions. Much like the previous one, start by simply standing with your legs 3-4 feet apart from each other. Lift your arms parallel to the ground and reach out to your sides with your palms down and shoulder blades widened.  

Here comes the exceptions part. Bring your left hip forward towards the right while rotating your upper torso to the left side. Next up, raise your inner left groin deep into your pelvis. You then have to bring your inner knee towards the left side of your foot.  Try to keep your right thigh parallel to the ground here.

Now, you need to raise your left hand towards the ceiling. After that, bring your left palm towards your head. Slowly inhale, and try to reach the arm over the back of your left ear.  The entire left portion of your body has to be stretched which means right from your left heel to the fingertips of your left hand. While you are at it, face your left arm. Your right thigh should stand parallel to the ground.

Hold this pose for 30-60 seconds and inhale to come up. Don’t forget to repeat the same process on the opposite side now.

Upward Plank Pose

Upward Plank Pose

Sit with your arms behind your hips and put your feet on the ground while bending your knees. Next, place your feet on the ground. At the same time, bring your big toes inwards.

Proceed to press down your hands against the ground and get your hips in a reverse table-top position. Your arms and shins should be perpendicular to the ground while your thighs and torso should be parallel to the ground.

Next, one by one, straighten both of your legs. Raise your hips, but don’t harden your butt. Your shoulder blades must be pressed against your back torso. Put your head back without compressing the back of your neck.  Hold this position for 30 seconds.

Boat Pose

Boat Pose

Begin by sitting with your feet laid straight in front of you.  Strengthen your arms by pressing your hands on the ground. Make sure that your fingers are pointed towards your legs.

Follow this up by lengthening your torso between the top sternum and pubis. You then have to sit on the “tripod” that lies between your tailbone and your two sitting bones. Next, angle your thighs at 45-50° to the ground while bending your knees. You then have to lift your legs off the ground.

Try and stretch your arms parallel to each other. If you can’t keep your hands in the air, then just keep them in the ground beside your hips. This is especially true for beginners.

Don’t harden your lower belly, but keep it firm though.  Keep breathing and lift the top sternum by pressing the heads of your thigh bone to the ground.  During your initial trials, hold this position for 10-20 seconds because it might cause intense feelings in your stomach and that is completely understandable. We don’t expect you to master it in a week or so. But as you get used to it, increase the time to around a minute.

Final Thoughts

Yoga helps develop your body and mind in a way that no other form of exercise can. Besides, its lightweight nature makes it extremely relaxing, which is in sharp contrast to let’s say, a high-intensity workout, which sometimes can be daunting for people to get used to.

Although yoga can be done at the comfort of your home, we recommend you get consultations from certified yoga practitioners. Nowadays, almost all of the best multi-gyms have dedicated yoga sessions because of their high potential. The fact that while losing weight with yoga, you are inadvertently contributing to the overall development of your entire body is in itself a reason enough for you to start this beautiful experience.

At the end of the day, the goal shouldn’t be just losing weight. It should be losing weight healthily, which is what yoga is all about.

Try These Simple Yoga Workouts to Sleep Better – Beat Insomnia Today

Not having enough sleep? Yoga can help! Just spend 15 minutes before going to bed with 8 simple and painless Yoga workouts and get better sleep.

Good sleep is what we all crave for, and failing to get good sleep is probably a common problem amongst all of us. As soon we face difficulties to fall asleep fast, we start scrolling our newsfeeds or exploring Netflix that worsen the problem. That’s pretty relatable, right?

Right now, 7 out of 10 people have this problem, and their casual approach is the reason behind the deterioration of their health. Lack of sleep at night makes them look dull and tired throughout the day. And how can we forget the unnecessary mood swings and anxiety? All these are the natural outcome of lack of sleep – specifically insomnia.

So, if you are dealing with insomnia, you should stop treating it casually. It’s high time to show your concern before it is too late. On a serious note, you can try Yoga – it can actually help you to sleep to have a healthy life.

What is Insomnia?

Good sleep is a result of a healthy lifestyle. So, it is pretty obvious that our lifestyle mistakes are greatly responsible for insomnia, especially among teenagers and adults. However, there can be medical issues like asthma, migraine, sinus, and lots of others, but our daily habits, stress, work pressure, and of course addiction to mobile often lead to insomnia too.

Apart from health issues, two types of insomniacs are found: The first type used to sleep late to study or to do some urgent work previously, and now they can’t sleep before that time. These people do not get sufficient sleep because of the hurry of waking up on a specific time.

The second type starts thinking as soon they go to their beds, and during this, they start watching a movie or scrolling on social media. When they are done with that, sleep is almost gone.

How Can You Get Better Sleep?

It really does not matter which type of insomniac you are as the lack of sleep is common in both. So disappointing and hopeless! But before you lose all your hopes and before you start depending on the un-prescribed sleeping pills, you can try Yoga at least once.

Yes, Yoga! It is probably the most neglected exercise because of the myth that it takes too much time, but the reality is it can give you permanent relief from insomnia.

8 Best Yoga Workouts for Better Sleep

You will need to spend only 15 minutes every day and that too before going to bed. Neither you will need to go to the gym, nor will you need any equipment for performing these yoga workouts.

Are you worried about pain? Well, these exercises will not be the painful ones; rather, your muscles will feel relaxed. A 15-minute Yoga session will reduce the stress level, which will lead to better sleep.

If you are still in doubt with the benefits of Yoga, you can check this survey results, which confirm that Yoga can reduce stress and give comfortable sleep. So, gear up and start doing 15 minutes of bedtime Yoga. Have a look at the details:

1. Legs up the Wall Pose

Legs up the Wall Pose

For this, you will need to lie on your back and first lift your right leg and then the left one. Let your legs relax on the wall. Stretch your feet towards the wall and bring it back to its original position. Now, extend your arms on the sides and keep your palms up. Close your eyes (you can use eye cushion), take a long breath and exhale slowly. Hold this position for 2 minutes.

You will feel the comfort right then if you have to stand for a long time. Your legs will be stress-free, and Lactic acid from your legs will be drained after doing this. Also, your lower back will get much comfort. You can take a blanket below the lower back and a pillow below your head to do this Yoga in a better way.

2. Child’s Pose

Child's Pose

It is another pose which can make you feel very comfortable and relaxed. For this pose, you will need to kneel on the floor. Keep your toes together at the time of kneeling. Now, slowly try to separate your knees as wide you can but do not pressurize to widen your knees.

Now, exhale and bend your upper body towards the floor and ensure that your belly touches the thighs. Rest your arms on the front side. Keep your shoulders relaxed and try to touch the ground with your forehead. It will take a few days to do it properly, but you do not need to pressurize. Try to hold this pose for a couple of minutes. If you are uncomfortable, you can try 30-45 seconds.

Once you can touch the floor with your forehead, try to swing your hands the back, keeping palms up.

Avoid this if you have injuries in the hip or knees. You can roll your head from left to right and then reverse to feel the comfort.

3. Standing Forward Bend

Standing Forward Bend Pose

Extend your feet to hip’s length or a bit wider.  Now bend your knees slightly and twist the upper body across your legs. Try to touch the floor (don’t pressurize) with hands. Hold this for 2 minutes. Inhale and exhale slowly while doing this.

Don’t worry if you are unable to touch your legs with the torso. It will take time, so you will not need to force your upper by stretching it towards the legs. Always try to bend as much you can do comfortably.

It will stretch your back muscles, and reduce the stress from your spine. As a result, the blood supply gets improved. Your neck and shoulders will be relaxed too. You will see the pressure to get released from your knees, hamstrings, and thighs. If you have a back injury, you can skip this.

4. Cat Stretch

Cat Stretch or Cat-Cow-Pose

Right after doing Standing Forward Bend, take a break of 30 seconds and then move on to Cat Stretch. It is also called cat and cow pose. For cat pose, kneel on the ground and extend your feet on the floor. Now bend your upper body and touch the floor with your arms extending them to your shoulder length. Pull your shoulder blade apart and try to create an arch from your head to the tailbone. Exhale while doing this, and at the time of inhaling, you have to do the cow pose. For cow pose, try to do a reverse arch from your head to the hips keeping arms and legs at the same position and continue this for 2 minutes.

In order to skip your spine flexible and strong, this exercise works very well. It can improve your blood circulation. Also, it helps in your digestion so that no digestion issue occurs at the time of sleeping.

5. Seated Forward Fold

Seated Forward Fold Pose

Sit on your hips; you can use a pillow or blanket if you have low back or hamstring problems. Now you will need to extend your legs in front of you. Stretch in and out your feet a few times, but keep your spine firm at the time of doing this.

Now raise your hand and breathe in. Now, slowly bend your upper body and try to touch your toes with hands. Exhale as you reach the toes but slowly. Make sure your arms are spread over your thighs, knees, shins, and toes.

Well, it is a bit difficult exercise, and you don’t need to force your hand to reach your toes on the first day. Keep it in mind that the target is to reduce pain and stress from your back and hips not to reduce fat from the lower abdomen. So, you don’t need to hurry.

On the first day, try to hold this pose for 10 seconds (not more than that) and gradually, increase this time to 1 minute. On the initial days, you may have some difficulties; you may use a pillow above the thighs at that time.

It helps to stretch your legs to reduce stress from them. Also, it will help your back to relax. As stress from the back will be gone, you will be able to acquire better sleep by choosing a comfortable sleeping position.

6. Reclining Bound Angle Pose

Reclining Bound Angle Pose

For this one, you will need to lie down and bend your knees, keeping your feet on the ground. Try to bring your feet close towards your tailbone. Now, put the soles together and extend your knees apart. Keep your arms relaxed on the sides keeping palms towards the ceiling. Try to touch the ground with the knees but without any pressure. It may take 10-15 days for that. Inhale and exhale at a slow pace and hold this pose for 2 minutes.

You will be able to feel the stretch once you can do it properly. In order to reduce tension from groin and hip areas, this exercise is an unbeatable one. Your thighs and joints will be free from the stress with this exercise. Also, your shoulders will feel calm and relaxed.

7. Thread the Needle Pose

Thread the Needle Pose

Start with kneeling, and you are free to use a blanket if you want. Lift your back and stretch your left arm on the right side, and your right arm will touch the ground above your head. Look towards the left hand and breathe in. Hold this for 10 seconds and breathe out slowly while bringing the left arm on the left side and the right one on the right side. Now, try on the other side. Do the cycle five times initially and increase it to 10 counts later.

It will help to stretch your upper portion of the back and reduce stress from your shoulders and neck. It will loosen the hamstring stress as well, which will allow you to have a comfortable sleep. If you have problems at the time of standing after sitting for a long time, it will be reduced by doing this.

8. Corpse Pose

Corpse Pose

End this session with this one to have a complete cycle. All sorts of Yoga exercises generally end with this one. Here you will allow your breathe-pace to come back to normal. You can do it on your bed as well. Keep your body relaxed and lie down comfortably. Rest your arms and shoulders. Keep your feet apart in a comfortable position and rest your back.

The goal of this exercise is to remove all the stiffness from your body and muscles.

If you are having trouble to sleep, these eight yoga poses will surely help you by reducing your stress to have a stress-free sleep. For more bedtime exercises to cure insomnia, feel free to consult the best gym in Kolkata. If you are dealing with insomnia for a long time, it will take time, but the results of Yoga will shock you. You will gradually love doing this for sure. Also remember that doing bedtime Yoga along with a healthy diet, a few morning exercises like running or swimming will be much appreciated to beat insomnia. Well, consulting a doctor for insomnia is never a bad idea, and if you think your doctor will prescribe sleeping pills, you are wrong. If you are having serious problems, do consult a doctor but keep doing Yoga for more effective results.

8 Powerful Yoga Workouts for Getting Toned Abs

Yoga workouts help in toning down your core and improving the posture of your body. Practice these Yoga Workouts for Toned Abs.

Nowadays, fitness enthusiasts primarily focus on getting toned abs and cutting down the stubborn belly fat. People often have seen to find out the best multigyms in Kolkata and put much effort to get toned abs because belly fat is not easy to cut down.

If you want to improve your posture and get toned abs in a natural process, then no other exercise can give you a better result like yoga. Practicing yoga workouts will not only reduce the fat of your belly, but it will save you from various diseases that are caused due to obesity.

A flat tummy not only makes you attractive, but it also helps you maintain the coordination and balance of your lower body.

Yoga Asanas for Flat Abs and Strong Core

You don’t need to spend an entire day in a gym. Adopt the power of yoga workout from an expert trainer because the regular practice of asanas will help you reach your fitness target naturally without experiencing any injury. Have a look at some of the most effective Yoga workouts for flat and toned abs:

1. Vrikshasana (Tree Pose)

Vrikshasana (Tree Pose)

This exercise helps in toning the abdominal muscles and strengthening the core. Vrikshasana helps in improving your posture and balancing your body. According to the fitness experts, Tree Pose increases your concentration power. People of every age can practice this yoga easily.

Steps:

  • Stand straight with 2-inches feet apart.
  • Focus on a point by looking straight in front.
  • Start inhaling and extend your arms up to join the palms.
  • Hold your left leg to the right leg like a Flamingo.
  • Continue deep breathing in that position by tucking your tummy.
  • Expand your spine upwards with every exhalation.
  • Repeat the same steps on the opposite side.

Caution: If you have insomnia or low blood pressure, then avoid practicing this asana.

2. Kumbhakasana (Plank Pose)

Kumbhakasana

This asana is one of the dynamic poses to cut the fat of your abs. If you stay long in this position, then this activity can be beneficial for you. Moreover, this asana helps in strengthening your thighs, hamstrings, and forearms. After pregnancy, women are suggested to practice this yoga for toning up the loose muscles of their belly. This yoga also helps in toning the muscles of your hands and defining the shape of your collar bones.

Steps:

  • Keep your hands and knees by assessing them in a tabletop position.
  • Your wrists should be beneath your shoulders, parallel to the top of the mat.
  • Now spread your fingers wide and distribute the weight throughout your hands.
  • Start lifting your chest higher and make it broad across your chest and collar bones.
  • Now look down by keeping your neck in a straight line with the spine.
  • Engage your thighs and core to prevent sagging in the back.
  • Lastly, lengthen your tailbone towards your heels.

Caution: If you have knee pain, shoulder pain, and high blood pressure, then take the suggestion of a physician before practicing this yoga.

3. Adho Mukha Svanasana (Downward Dog Pose)

Adho Mukha Svanasana

Practicing Downward Dog Pose will not only help you in toning your abdominal muscles, but it will also shape up your waist. This asana helps in boosting the strength of your core muscles and strengthening your forearms. This asana also removes the stiffness of your shoulder and reduces the pain of spondylosis.

Steps:

  • Kneel on the floor and keep the distance between your two legs.
  • Keep hip-width distance.
  • Now press your hands on the ground.
  • Straighten your knees, elbow, and heels by touching the floor.
  • Lift up your head and bend the knees.
  • Now gently sit on the floor.
  • Inhale and exhale slowly while practicing this asana.
  • Repeat the steps of this asana three times.

Caution: Don’t attempt this yoga if you have high blood pressure or shoulder discomfort. Moreover, if you are pregnant, then consult the doctor before adding this asana in your fitness routine.

4. Virabhadrasana 1 (Warrior Pose 1)

Virabhadrasana

If you are finding a powerful way to tone and strengthen your abs then Virabhadrasana is the best choice for you. This asana will also help in toning the muscles of your shoulder and thigh. This is a part of a stretching exercise that slowly pulls your core muscles.

Steps:

  • Breathe in and breathe out deeply.
  • Keep your legs wide 4-5 feet apart.
  • Now, raise your arms upwards and join both the palms over your head.
  • Keep the right foot outwards 90 degrees to the right side.
  • Now keep the left foot inwards 45-60 degrees to the right.
  • The right heel should align with the arch of the left heel.
  • Rotate your torso to your right side and keep your arms straight.
  • Bend your right knee until your thigh becomes parallel to the floor.
  • Form a 90-degree angle alignment between your right shin and right thigh,
  • Remember, the bent knee should not extend beyond your ankle.
  • Now look at the upward direction and join your palms.
  • Retain this final position as much as you can hold.
  • Now, reverse the movement to another side.
  • Repeat the steps of the asana twice to get a better result.

Caution: If you have diarrhea, then avoid this asana because this pose may create pressure on your abdomen. Moreover, arthritis patients are suggested not to practice this exercise.

5. Virabhadrasana 2 (Warrior Pose 2)

Virabhadrasana 2

This asana stimulates in toning your abdominal muscles by engaging your lower body part. If you practice Warrior Pose 2 regularly, then it will tone down your thighs also. This yoga is good for the health of pregnant women. Moreover, it relieves the stiffness of your shoulder, back, and neck. Health experts suggest practicing this exercise to reduce the problem of sciatica. This yoga also aids proper digestion.

Steps:

  • Keep your arms in line with your shoulder, parallel to the floor.
  • Stretch the arms as much as possible.
  • Look straight to your right side by keeping your head right.
  • Keep your torso straight and in an erect way.

Caution: If you have arthritis, then take the help of a certified fitness trainer for practicing this yoga. People who are suffering from cardiac issues and high blood pressure should avoid practicing this yoga.

6. Purvottanasana (Upward Plank Pose)

Purvottanasana

Along with your abs, your waist and an upper back portion will also be toned if you practice this yoga. This asana helps in strengthening the muscles of your arms, glutes, wrists, core, legs, and back. This yoga also acts in reducing fatigue and depression to relax your mind.

Steps:

  • Stand in Dandasana or staff pose.
  • Keep both your hands behind your hips, and your fingertips should face the feet.
  • Bend your knees and keep your feet on the floor, and your feet should be hip-width apart.
  • Now push your feet and hands strongly on the ground and breathe out. Keep your arms straight.
  • Straighten your spinal muscles by pointing the toes in an outward direction.
  • Raise your hips as much as possible, and hold it as much as you can hold.
  • Repeat this process around 3-5 times.

Caution: If you have pains and injuries on your wrist, then this asana should be avoided.

7. Setu Bandhasana (Bridge Pose)

Setu Bandhasana

This yoga is like crunch exercise It keeps the muscles of your core tight and lifts up your lower body. It is one of the easy asanas, so people of any age can practice this yoga. It also provides a toned waist.

Steps:

  • Lie down on your back at first.
  • Fold or bend your knees and keep your hip with your feet distance apart on the floor.
  • Now take your arms just beside your body, and your palms should face down.
  • The distance should be about 10-12-inches from your pelvis.
  • Keep your knees and ankles in a straight line.
  • Hold the position as much as you can do.
  • Now return back to your normal position.

Caution: If you are pregnant, then ask a health practitioner while practicing this asana. Moreover, if you are having back and neck injuries, then you cannot practice this asana. Always try practicing safe exercises during pregnancy to avoid problem.

8. Naukasana (Boat Pose)

Naukasana

This yoga workout provides you toned abs and also improves your stamina. Naukasana helps balance your back and the entire body. The main focus of this workout is on your belly and the bottom part of your body. This yoga strengthens the muscles of your arms, shoulders, and thighs. Moreover, it improves the functions of your liver, kidneys, and pancreas. Practicing this workout regularly will regulate the sugar level in your blood.

Steps:

  • Lie down flat on the floor, and keep your arms and feet together on your sides.
  • Now keep your fingers and arms straight outstretched towards your toes.
  • Lift your chest and feet from the ground by stretching your arms towards your feet. You will feel the tension in your stomach area while practicing this asana.
  • Let the weight of your entire body rest on your buttocks, and make sure that your toes and fingers are in one line.
  • Hold the breath in this position for a few seconds.
  • Inhale and exhale slowly while practicing this yoga.
  • You can do 3-4 repetitions while doing this asana.

Caution: The patient of arthritis should take the help of a yoga trainer for practicing this asana.

Regular practice of the aforesaid asanas improves the balance of your body and helps you reduce the strain of your spine and torso. These asanas are safe to practice and you will naturally start gaining the results in six months if your practice these yoga workouts continuously. Along with fat cutting formulae, yoga is also strength training workout that helps in building stamina.

TOP 3 HEALTH BENEFITS OF YOGA – BUILD A PERFECT YOU, PHYSICALLY AND MENTALLY

These health benefits of Yoga will stimulate you to start your Yoga session right now! Know about the benefits before you start your Yoga session.

The health benefits of Yoga are unheard to none. Better sleeping, flexibility, fewer colds, or more relaxation are some benefits that you often get to hear. But perhaps, you may not know the benefits in detail. Thus, we are going to give you a detailed knowledge about the yoga benefits you can enjoy. Yoga is an ancient Indian exercise which is said to be practiced to attain a peace of mind and open-mindedness for coming across your true self. So, let’s get into the benefits of this divine exercise technique.

TOP 3 HEALTH BENEFITS OF YOGA

The scientific researches have proven that Yoga can prevent and cure diseases. So, you can never ignore the health advantages that Yoga offers. Below are the most profitable aspects of the Yoga.

1. FLEXIBILITY

Undoubtedly, Yoga makes you inhumanly flexible. During the first class, you may not touch your knees with your head but with regular practice and dedication, you would realize that your muscles are loosening. Gradually, the most impossible poses will also become possible for you and you will discover the pains and aches are starting to disappear with time.

2. MUSCLE STRENGTH

When you stretch yourself, you’re actually stretching your muscles! Strong muscles can do much more than just ‘looking good.’ The strong muscle prevents the ‘household’ diseases like arthritis, spondylitis, or back pain.

When you do Yoga and achieve a flexibility, you can fight various diseases. But Yoga is different from going to the gym and lifting the weight. If you are doing so, you are making your muscles stiff at the expense of the flexibility.

Act smart and avail the health benefits of Yoga.

3. BETTER BONE HEALTH

The weight bearing exercises do strengthen your bones and help ward off Osteoporosis. Well, you don’t have to go to the gym and start climbing and banging the iron weights to do so. When you do Yoga, there are various techniques that require you to lift your weight. Upward and Downward Facing Dog can strengthen your arm bones. Yoga is also able to diminish the level of the stress hormone – cortisol that keeps the bones stronger. So, there’s no denying of the health advantages of Yoga.

Since you are aware of the top health benefits of Yoga, you must be willing to join a Yoga class to take your health and fitness to the next level. Well, in that case, Starmark Fitness Studio can help you with its Scientific Yoga techniques and certified trainers.